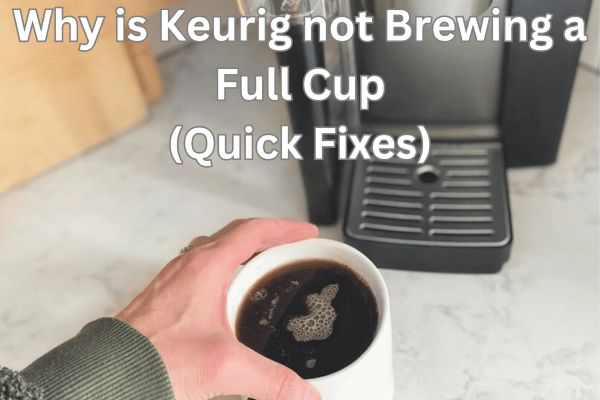
Do you notice your Keurig failing to brew a complete cup lately? Nothing’s more frustrating than getting less coffee than expected from your K-Cup machine.
The good news is this problem can often be easily fixed on your own without an expensive repair call. In this guide, I’ll cover three straightforward troubleshooting tips to resolve a Keurig not brewing full cups of coffee.
why is Keurig not brewing a full cup?
These are the five most common reasons for Keurig not making a full cup of coffee.
- Clogged needles (exit needles may be clogged by coffee grounds, tea, or cocoa mix).
- Keurig machine need to be descaled.
- Buildup around the water tank valve
- Electrical fault
- Faulty brew Basket
Before going into details you must make sure that you didn’t set up the auto shut-off feature, as it might turn the machine off while brewing. And also check whether the water reservoir is correctly installed or not!
As an Amazon Associate, I earn commission from qualifying purchases.
3 tips to fix Keurig not making a full cup
1. Unclogg the Needles
If your Keurig is not brewing a full cup of coffee then first thing you need to do is to clean the needles of your coffee maker.
Over time, coffee grounds, tea, or cocoa mix can accumulate around the needles, causing a clog that hinders the flow of water and results in blockages.
This issue is more likely to occur if you leave used pods in the machine after brewing.
This Clogging also causes the Keurig machine to shut off while brewing.
Follow these simple steps to clean the clogged Keurig needles
- Turn the machine off, and remove the water reservoir
- Tightly grab the edges of the pod holder and take it away from the machine.
- Now, remove the funnel from the pod holder
- Take a paper clip or sewing needle and move it around in a circle a few times inside the hole of the pod holder.
- Rinse the pod holder and funnel with water and let them dry
- Now for the top entrance needles, open the head and look beneath. You will observe two holes for the needles that need to be cleaned
- Insert the paper clip or sewing needle in the hole and gently move it around to remove any clogged particles.
2. Keurig machine need to be descaled
Scaling inside the Keurig machine can also be the reason why Keurig is not filling a full cup of coffee. If you won’t descale your machine on time, this buildup eventually results in a blockage that potentially does not let the machine brew properly.
This can also cause Keurig to dispense slowly.
As per Keurig reccomendations, you should descale your machine once in 3-6 months or after 300 cups of coffee, whatever will come first.
You can use Keurig descaling solution or white vinegar for descaling.
Here’s how you can easily descale your Keurig
1- Start by emptying the water reservoir completely. Then pour equal parts vinegar and water (or follow the instructions if you are using a descaling solution on the package) into the water reservoir and place your mug under the dispenser like normal.
2- Now turn on your Keurig and press the largest brew size button to start the descaling process. Keep repeating the process until the tank is fully drained. (Or you might have to enter the descaling mode depending on your model)
3- When it finishes, refill the reservoir with fresh water and run 2-3 clean cycles to rinse out any leftover vinegar taste.
Here are the descaling instructions for all the Keurig Models
If you haven’t descaled your Keurig for more than six months or you are using hard water, then you might need two descaling cycles.
3. Buildup around the water tank valve
If there’s some problem or blockage at the valve, then the machine cannot pull the required amount of water for a K-cup, eventually resulting in Keurig not being able to pump water or brew a full cup.
Descaling often solves this problem but if you have already descaled the machine and still facing this problem then follow these steps to clean the exit valve of the tank.
- Remove the water tank and empty it. Also, clean the area where the water tank connects to a machine with a towel or soft cloth.
- You can find the valve at the bottom of the water tank. This valve is held by three screws. Take a screwdriver and unscrew the valve.
- There is a screen inside the valve which might be clogged by water minerals.
- Now take a cup of vinegar and place the valve in it for 1 to 2 hours. Vinegar will remove all the buildup material
- Rinse the valve with water properly before putting it back into the machine.
- Hopefully, it will solve your problem.
Additional Tip: If you have a turkey baster. Use it to suck air from piping and water reservoirs. Sometimes stuck air bubbles inside the machine can cause this problem.
A Weird but working Solution
Remove the water reservoir and turn the Keurig upside down. Shake the machine and Hit the bottom two to three times gently. And you will be amazed because it works!
It works because it helps to remove trapped air bubbles inside the machine.
Keurig not brewing full cup after descaling or cleaning
If all the above-mentioned hacks didn’t work and the problem is still there, then the only solution before calling a professional technician is to reset your machine.
Reset the machine
Most of the Keurig model doesn’t have a proper reset button available, so in order to reset them, you need to follow these steps.
- Turn off and unplug the machine and wait for 5 to 10 minutes.
- Empty and remove the water reservoir.
- Keep it disconnected for one to two hours.
- Reconnect the machine and place the water tank back. Open and close the head of the machine.
- Now your machine is restored to factory settings.
Here’s a detailed guide on Resetting Keurig machines
Contact Keurig support
If your Keurig is clean and nothing is stuck inside the machine, and you have already restored the machine to factory settings. Then there might be a technical electrical fault that is not letting the Keurig fill a full cup of coffee.
In that case, you can call a technician to seek help. Or if your machine is still in the warranty period then call Keurig customer support. They will repair or replace the machine free of any cost if the warranty is valid.
Keurig Model reviews
Final Thoughts
And that’s a wrap on fixing your Keurig from brewing pathetic partial cups! Now that you’ve mastered fixes like cleaning needles, descaling buildup, and resetting the machine.
I hope these simple tricks get your coffee capacity back up to par so you can get your morning jolt without having to double up on pods.
Did these tips work like magic for your Keurig? Share your triumphs below in the comments!
FAQs
Is it worth repairing a Keurig?
The typical lifespan of a Keurig machine is 3 to 5 years. If your machine is under that period then I think it will be more feasible to repair your Keurig instead of purchasing a new one.
OTHER KEURIG TROUBLESHOOTING ISSUES AND SOLUTION

This was such a useful article. I was having issues with my Keurig Classic not brewing properly but couldn’t figure out why. After deep cleaning the needles like the article suggested, it’s working like new again!
I am glad you find it useful. Yes, cleaning needles work wonders for keurigs!
Is it normal for Keurigs to stop brewing full cups after a while? Mine’s only a year old.
Tried the cleaning the needles, didn’t help. Maybe I’ll try descaling next. How often do you guys maintain your machines?
If you haven’t descaled the machine in a year, you should descale the machine as soon as possible. The mineral buildup inside the machine blocks the water flow and results in shorter cups. You have to descale every 3-6 months
Thanks for the tips! My Keurig was being so annoying with the half cups, but that cleaning needles actually worked. Saved me from throwing this thing out the window lol