Have you ever wondered what lies inside your beloved Keurig machine?
Beyond its sleek exterior and the delicious coffee it brews, there’s a secret world—the intricate inner workings of water and coffee. It’s important to keep it clean and well-maintained to ensure its smooth operation and avoid any problems.
Draining your Keurig machine can be done in different ways, depending on your available time and technical knowledge.
In this article, I will teach you in detail how to drain a Keurig coffee maker and why it’s important.

Inside and outside the water tanks
There are two water tanks in every Keurig coffee maker the internal and the external water tanks.
Outside water tank
The outside water tank is where you add water for brewing coffee.
In many Keurig models, this tank can be easily detached, so you can easily clean and drain it when needed.
Inside the water tank
This water tank is present inside the Keurig machine and you can’t easily access it.
The purpose of the inside water tank in a Keurig is to store and provide the water necessary for brewing coffee. It serves as a reservoir that holds an adequate amount of water, ready to be heated and used in the brewing process.
The inside water tank ensures a continuous supply of water, allowing for efficient heating and convenient brewing with the push of a button.
If you use your Keurig regularly, you don’t need to clean and drain the inside water tank. The water is circulated and stays clean, but if you are going to store your machine for a longer period, you must drain it to prevent potential damage.
How to Drain Keurig without disassembling the machine (2 Ways!)
Here are 2 quick ways to drain the internal tank of Keurig completely without disassembling the machine.
These are simple tricks that may or may not work with your Keurig model.
1st quick way to drain Keurig
1- First completely empty the water reservoir of your Keurig machine
2- Find the floating disc at the reservoir’s base. Take your hand inside the water tank and raise the disc to the top position.
This will trick the machine into believing that the water reservoir is full.
Note: Not all the Keurig models will have this floating disc inside the reservoir.
3- When you pull the floating disc to the top the machine will stop showing the “add water” indicator and you can dispense the hot water that is already present in the inside water tank.
4- Now without inserting any K cup in the machine press the largest cup size to drain the inner water tank.
5- You may have to repeat the above step more than once to drain the inner tank completely. Basically, you have to repeat these steps until Keurig displays the “prime” message. This means that the inner tank is completely empty of water.
Watch the video below for complete instructions
2nd quick way to drain Keurig
This is another quick trick to completely drain the Keurig machine that may or may not work with your model.
1- First, remove the water reservoir from the machine. Without the water reservoir attached, the machine will keep displaying the “add water” indicator and won’t let you brew anything.
2- Now insert the water reservoir correctly and your machine will proceed to the next step.
3- Now remove the water reservoir again and select the largest cup size. The machine will start dispensing water from the inner water tank.
4- You may have to repeat the above procedure a couple of times to completely drain the inner tank of your Keurig.
Watch the video below for complete instructions
How to drain Keurig K Mini and Mini Plus
The Keurig Mini and Mini Plus are the only Keurig models that you can fully drain without any tricks or disassembling the machine.
Since these are small, portable models that can be used for traveling, it is important to drain them properly before transporting them from place to place.
Here’s a step-by-side guide to draining single cup Keurig Mini models
1- Turn off the machine: Turn off the machine by pressing the power button and wait for it to turn off. Do not unplug the machine.
2- Place a cup on the drip tray: Place the cup under the brew head of your Keurig to catch all of the water draining from the machine.
3- Lift the brew head: To drain the water, lift the brew head and close it without inserting any coffee pod. The water will flow into the interior of the machine. If there is a lot of water, you may need to repeat this step multiple times.
4- Press the brew button: Press and hold the brew button until water begins to flow into the cup. Wait until all of the water has drained from the machine and after that discard the water.
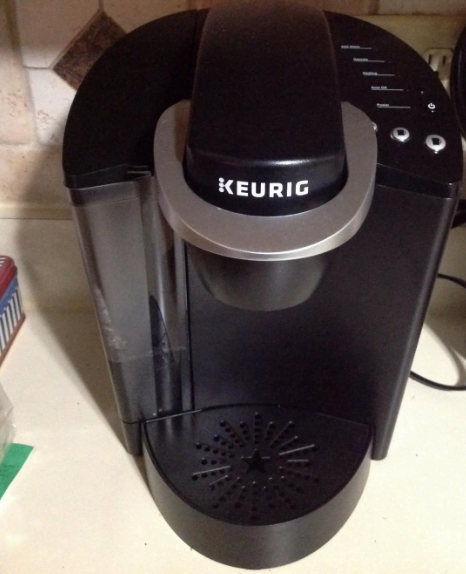
How to drain Keurig K classic | Complete disassembling
Here’s how you can completely drain the Keurig K classic or any other similar model by disassembling and accessing the inner water tank.
Note: If you are unsure or unfamiliar with the disassembly process, I will not recommend doing it yourself. As Keurig is a sophisticated machine, you might break it during the disassembly process. And if your Keurig is in the Warranty period it’s strictly not recommended to disassemble it as it can void your warranty.
Tools Required:
- A small screwdriver
- Bendable plastic straw
- Zip ties
Step-By-Step Guide:
1- Power Off your machine and wait until it cools down.
2- Lift the lid of the machine and find two screws right underneath the head.
3- Remove these screws with the screwdriver and you can easily slide off the top.
4- Now inside there are two tubes attached to the top of the internal water reservoir. One tube is at the top, and the other is located toward the right back.
5- Depending on your Keurig model, the tubes may be attached to the metal tank with zip ties. If you have additional zip ties, you can cut the zip ties with scissors or you can wiggle the zip ties to loosen them.
Once you have removed the zip ties, detach the tubes from the water reservoir.
6- Once the silicone tubes have been removed, insert the plastic straws into the openings. Then, turn your Keurig machine upside down to drain the water tank completely.
Plastic straws are not necessary for this step, but they will help the water drain more quickly.
7- After the machine is completely drained, attach the silicone tubes back and attach them to zip ties. Finally, replace the top lid and use a screwdriver to tighten the screws.
Watch the video below for complete instructions
Read a review of Keurig K classic
How to drain Keurig K Elite | Complete disassembling
Here are the instructions on how to drain a Keurig K Elite or any other similar model by disassembling and accessing the inner water reservoir.
Step-By-Step Guide:
1- Unplug the machine and detach all the removable parts i-e the Drip tray and the water reservoir.
2- There is a small screw on top of the machine that needs to be removed after that you can slowly take apart the top lid.
3- Now move to the bottom and you will find six screws there. Remove them.
4- Now remove the plastic piece that is present at the front right of the machine. Just lift the machine upward and slide the piece toward the bottom to remove it.
5- After that you can take off the complete plastic casing of the machine easily by simply lifting it up. This will give you access to the interior of the machine.
6- Here you will find the tubes connected to the internal water tank of the machine. Wiggle off the tube and the water will start draining from the tank immediately.
7- Once the tank is empty, shake the machine to drain any remaining water drops.
8- Finally, reverse the process to put the machine back together.
Watch the video below for complete instructions
Read a review of Keurig K elite
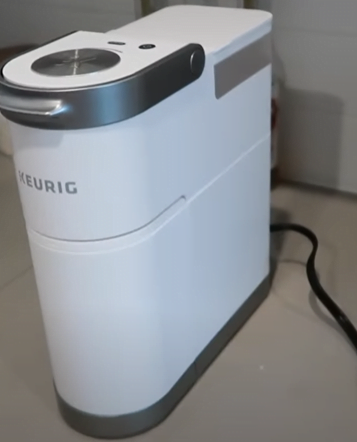
How to drain Keurig 2.0 brewer | Complete disassembling
Here is a step-by-step guide on how to drain Keurig 2.0 models completely for storage
Step-By-Step Guide:
1- Before you begin, make sure the machine is turned off and unplugged from the power outlet. Then, lift the handle to reveal the chrome ring around the top back of the machine. Detach the chrome ring by unclasping it from the body.
2- Now move to the bottom and you will find six screws there. Remove them.
3- Next, slide off the tall silver piece on the front right side of the machine. Then, slide off the front of the machine.
4- Now put your machine straight and unscrew the two screws near the top of the water reservoir side. Then, work your way around the top of the brewer to remove the entire top collar of the machine. Also, remove the entire plastic casing.
5- You will see two tubes attached to the water intake assembly. Remove them and press down on the center of the intake piece to drain the water.
6- There is a screw near the base of the motherboard that holds the internal filter. Remove the screw to wiggle out the filter.
7- There are two screws that need to be removed to free the filter assembly, pump, and internal water tank from the base. One screw is located at the base of the motherboard, and the other is on the other side of the machine. After the screws are removed, carefully lift the assembly out of the base.
8- Now remove the silicone tube that attaches the internal filter to the pump assembly by firmly pulling it away from the assembly.
9- To help the water drain better, you can pull out the tube that is attached to the top of the water tank. This will allow air to come in and displace the water, making it easier to drain.
10- Finally, detach the tube that leads from the pump assembly to the water tank. And the water will start to drain quickly.
11- There are still some water drops inside the machine so insert and straw or a syringe to suck the water out.
12- Still there may be some water droplets inside the machine. To remove them, insert a straw or a syringe and suck the water out.
13- You have successfully drained your Keurig 2.0 machine. Now simply Reverse the steps and reassemble the machine.
Also read: What is Keurig 2.0 and why it’s discontinued
When and Why to Drain a Keurig?
There are certain situations and maintenance routines that may require you to empty a Keurig machine completely.
Extended Periods of storage
If you’re going to be away from home for an extended period of time, such as on vacation or a long business trip, be sure to empty your Keurig internal tank and pipings completely to prevent bacteria or mold growth.
And if you live in a colder environment this could get even worse the water will freeze inside the pipings of your Keurig and eventually destroy it.
Changing Water Source
When switching water types, like bottled or different water, it’s important to completely empty the Keurig internal tank. This will help to prevent potential minerals or contaminants from the old water source from affecting the taste of your coffee.
Also read: Best water for Keurig coffee machines
Cleaning and Maintenance
Draining your Keurig is an easy way to keep it running smoothly and brewing delicious coffee. It flushes out any residual coffee, debris, and mineral deposits that can build up and cause problems.
Transport or Storage
It is always best to empty your compact Keurig machine before transporting it, whether you’re going on a trip or moving to a new home.
Draining your Keurig can also solve problems such as:
FAQs
How Often Should You Drain Keurig?
You don’t really need to drain your Keurig machine if use and clean it regularly, the water will keep moving through the tanks and tubes, preventing any nasty growths from forming. Regular cleaning and descaling will also take care of any buildup that does occur.
However, if you’re going to store your Keurig for weeks or months, it might be a good idea to drain it just to be safe.
Can You Store Keurig Without Draining?
Yes, you can store your Keurig without draining it, but it’s always a best practice to drain it properly if you are not going to use it for months.
What Water To Use In Keurig?
Filtered water is generally considered the best option for brewing coffee in a Keurig machine. This water has very less impurities and just the right amount of minerals that improve the taste of your brewed beverages.

Unable to drain with pushing up on the float and running it. Giving to Good Will.
What’s your Keurig Model?
I have a model K80 and can’t find any good video or instructions on how to completely drain internal water reservoir.
I have a K70 model and did the push up on the magnet, it did not work no water.
Are you trying to drain your machine completely?