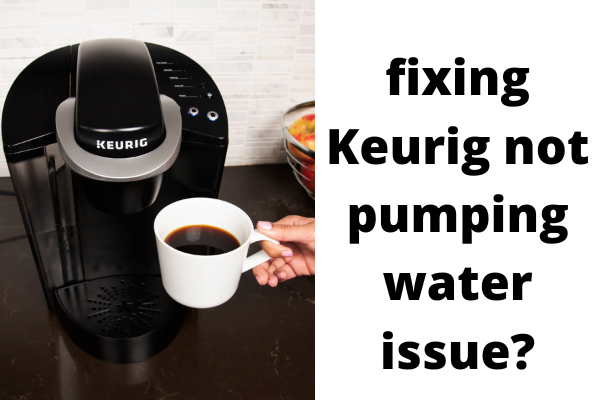
How frustrating a situation is when you wake up in the morning rushing to your Kitchen in the hope of a good cup of coffee and find that your Keurig is not working properly.
reasons why your Keurig is not dispensing water
These are some potential reasons why the water is not flowing properly through your Keurig.
- Clogged water lines and filters due to the buildup of debris and scales
- Add more water Error
- Air bubbles in water channels lead to blockage
- Misaligned Keurig components
- Clogged entry and exit needles
- Magnet issue
- Water is below the minimum fill level
- faulty or clogged mesh screen in the reservoir
- Damaged pump
As an Amazon Associate, I earn commission from qualifying purchases.
6 Solutions for Keurig not pumping water
Solution 1) Descale your Keurig coffee machine
Seemingly, clogged water lines and filters are one of the most prominent reasons why your Keurig not pumping water properly.
So it is recommended by Keurig to descale your machine every 3 to 6 months or after every 300 cups of coffee to unclog the water lines from minerals.
The water we use for brewing coffee leaves some minerals that cause limescale buildup inside the machine. With time, this buildup gets big enough and results in clogged pipelines. This can also cause the Keurig to drip slowly.
You can use Keurig Descaling solution or white vinegar for descaling.
Here’s how to descale Keurig
- Prepare a solution in the water reservoir of Keurig using equal parts water and white vinegar or a descaling solution.
- Remove any K cup from the capsule holder and start the brewing cycle by pressing the largest cup size button. Keep doing it until the water reservoir is empty
- After descaling, run plain water through the Keurig to rinse.
Solution 2) Air bubbles in water channels lead to blockage
Air bubbles escape in the pipe while drawing water from the water tank and obstruct the water flow.
This usually happens when you try to run Keurig without filling the reservoir with water. Because there is no water in the tank, the pump sucks air bubbles into the water channels.
And these air bubbles get stuck in the water pipes and Keurig faces problems in pumping water even if you fill the water tank after that.
To get air out of Keurig, follow these instructions.
- Unplug the brewer, and remove the water reservoir and drip tray.
- Grab the Keurig in both hands and shake it vigorously or spank gently at the back 4-5 times. This may sound weird but this shaking will help to get rid of air bubbles stuck inside.
Another hack to get the air out of Keurig
Open the water reservoir tank, and shut the connection (opening hole) of the coffee maker and water tank with your finger.
Now, run a water-only brew cycle without inserting any pod inside the machine. This forces the brewer to pump water through the water lines, expelling any air bubbles that are creating the clog.
Make sure that you cover the water hole with your finger throughout the process.
Or this video may help to solve this problem.
Solution 3) Clean the water tank exit valve
The Keurig machine won’t be able to draw water if there’s a problem or blockage at the water reservoir exit valve.
In many cases, this issue can be resolved by descaling the machine, but if the issue persists, you should follow these steps to clean the exit valve.
- Empty the water tank. Use a soft cloth or towel to clean the area where the water tank connects to the machine.
- The valve is located at the bottom of the water tank. The valve is held in place by three screws. Unscrew the valve with a screwdriver.
- The valve has a screen that might be clogged with minerals in the water.
- Place the valve in a cup of vinegar for one to two hours. All the buildup material will be removed by vinegar.
- Rinse the valve with water properly before putting it back into the machine.
Hopefully, it will solve your problem.
Read a guide on How to Clean a Keurig Coffee machine
Solution 4) Clean needles to unclog the Keurig that is not dispersing water
There are top and bottom needles that punch holes in the pods while they are brewing.
Over time, coffee grounds get stuck around needles and eventually become clogged. This condition is more likely to occur if you don’t dispose of the K cup immediately after brewing.
Clogged needles restrict the flow of water, so Keurig will not dispense water fully or your Keurig might not make a full cup.
Clean the exit needle that is located at the bottom of the base holder.
- Lift the lid handle and remove the pod holder.
- After that, remove the funnel present at the bottom of the pod holder.
- Take a paper clip or sewing needle and move it around inside the tube to remove any kind of debris.
- Rinse the pod holder and funnel with warm, soapy water.
To clean the needle located inside the Keurig head, follow these instructions.
- Turn the machine off.
- You will find the top needles underneath the head of the machine with caution.
- Take a paper clip or sewing needle and insert it into the holes of the needle. Move around the clip to remove debris.
Watch this video for detailed instructions.
Remember, the machine may eject hot water after unblocking the upper needle. It is recommended to wait for the machine to cool down before trying to unblock the inlet needle. Also, while working with sharp needles, be careful.
Solution 5) Ensure correct water magnet alignment
There are magnets inside the water tank by which Keurig identifies the water level inside the tank.
Sometimes with the regular use of the coffee maker, the water magnet gets misaligned from its original position due to vibrations while brewing. Keurig becomes unable to detect the water level and eventually stops dispensing water if the magnets get misaligned.
To resolve these issues, follow these instructions
- Tap the tank slightly near the magnet housing.
- If this doesn’t function, give it a slight shake.
- If you still don’t succeed, then you’ll need to purchase a new water tank.
Some Keurig models detect the water level in the tank by sensing the minerals in the water. That sensor will not work if you are using distilled water. So if you use distilled water for brewing coffee that might be the reason your Keurig is not pumping water.
Solution 6) Damaged pipe or pump
If the problem persists after complete cleaning and descaling. Then there might be a leak in the inlet pipe or the pump of your machine might be damaged.
To check the pipe or pump, you have to disassemble your Keurig machine. If you detect any holes in the pipe then these are the main culprits why Keurig is not pumping water. In that case, you have to repair the water pipe of your Keurig machine.
But before going to take any kind of step, it is highly recommended to contact Keurig customer support to seek their professional support.
This video will help if you are going to do it on your own.
What to do if Keurig coffee Maker still not Pumping water?
If all the above-mentioned tips have not proved fruitful for you, and the problem is still there, then you can call Keurig customer support or seek help from a technician.
If your machine is still under warranty then Keurig customer support will repair or replace the machine free of any cost.
However, if your machine is more than 6 or 7 years old and keeps teasing you by getting damaged every now and then. I recommend you buy a new machine because your Keurig has already completed its lifespan.
Keurig Review Articles:
FAQs
How long does Keurigs last?
Many users have said that their Keurig machine lasts up to 3 to 5 years. This is the mean lifespan of Keurig machines.
For sure, there are discrepancies some Keurig may last for more than 10 years or some may get damaged within 1 or 2 years if not maintained properly.
How to reset a Keurig?
To reset a Keurig coffee maker, just unplug the machine, take out the water reservoir, and let it sit for 10-15 minutes before plugging it back in.
Here’s a guide on resetting Keurig Machines
Related Keurig Articles:
- Why is Keurig water not hot enough
- Why does Keurig leak water
- How to Drain a Keurig Machine
- Why is Keurig frother not working