Is your Keurig leaking water from the bottom or the top while pre-heating, creating a frustrating mess?
In this article, I’ll get straight to the point, providing you with effective solutions to fix the common Keurig leaking issues, so you can enjoy your coffee without any mess.
The first step to solving Keurig leakage: Clean and Descale Keurig Coffee Maker
Unless there are electrical issues or some broken parts, most of the issues you encounter in Keurig can be solved with proper Cleaning.
In other words, your Keurig needs descaling
Limescale buildup is a common problem in Keurig machines. It is caused by the minerals in the brewing water. If limescale is not removed, it can clog the water pathway, resulting in leaks.
Additionally, Clogged Keurig machines can also produce bad-tasting coffee and stop pumping water effectively.
Therefore, Descaling is necessary to overcome all these issues. It is recommended to descale Keurig once every 3 to 6 months or after every 300 cups of coffee.
Here’s a step-by-step guide on cleaning and descaling your Keurig.
- Remove the drip tray, water reservoir, and capsule holder.
- Rinse and clean all these removable components of your Keurig with warm and soapy water properly.
- Fill the tank with solution or vinegar and water and run a descaling cycle. Descaling will remove all the accumulated minerals from your machine.
- After descaling, run 1 to 2 rinsing cycles with hot water only. Otherwise, your coffee will taste like vinegar.
You can buy a descaling solution from here
Keurig leaking from the bottom
If your Keurig machine is leaking from the bottom then most probably there is an issue with the water reservoir. Let’s discuss these problems in detail.
1)Defective O-Ring
There is a chance that the O-Ring that is responsible for establishing a secure connection between valves and pump gets worn out or misplaced.
Solution
First, check whether the O-ring is present at its original position or not. As it might get misplaced due to vibrations in the machine while brewing. Try adjusting the position of the O-ring.
If adjusting the position of the O-ring doesn’t work then the solution is to replace the old one with the new one.
You can simply order a new O–ring from Keurig’s official website or from Amazon. However, you should be familiar with your brewer model because different models fit different O–ring.
If you find it difficult to replace it all by yourself, you can contact Keurig’s official website to seek professional help
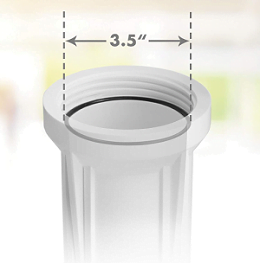
2) Cracked Water Reservoir
The water reservoir may develop some cracks if you wash it carelessly and that eventually leads to leakage of water from the bottom of the Keurig machine.
First, you should look for a visible crack in the water tank. If there is no visible crack, fill the tank with water and place it on a cloth.
Notice the cloth after 15 to 20 minutes. If the cloth is dry then your water reservoir is good and if the cloth is wet then there must be some small holes inside the water tank that are not visible.
Solution
Depending upon the extent of the crack, you need to buy a new water tank or repair the older one. For repairs, you can use a dab of hot glue, or you can even solder the water tank.
If the water reservoir is non-repairable, then you can find a new one compatible with your model on the Keurig website.
It is highly recommended to replace the water tank with a new one because repairing the older one will not last any longer.
3) Defective exit seal
There is a little valve at the point of connection between the water reservoir and the brewer.
This valve might get worn with time because of the limescale buildup and scaling.
Carefully examine the seal on the valve, as water usually leaks from this seal.
Solution
First, clean both the valve and base connection with a white vinegar solution. Wipe it and put back the water reservoir to check for any kind of leakage.
If cleaning doesn’t help apply some Oatey Silicon Grease. It will restore the seal and strengthen the connection between the water reservoir and the brewer.
Keurig leaking water from the top or Pod Holder
There can be a few possible reasons why is Keurig leaking water from the top.
1)Overfilling the Water Reservoir
If you fill the Keurig water tank above the max fill line, the machine is likely to leak. This is because there is simply too much water in the tank, and the pressure will eventually cause it to overflow.
This is a common problem encountered in Keurig K-Mini, in which the water tank is non-removable, and it is hard to judge the maximum level of the tank.
Read a detailed comparison of Keurig Slim and Mini
Solution
Overfilling the water tank is a common cause of Keurig leaks. When water heats up, it expands, which can put pressure on the tank and cause it to leak.
To avoid this, always fill the water tank to the max fill line or below.
2) The needles are clogged
Keurig coffee machines can leak if the needles become clogged with used coffee grounds. This is a common problem, so it is important to clean the needles regularly.
Internal debris can cause the needles to clog and block the water path, which can lead to water leaking from the pod holder.
Solution
You have to clean both the top and bottom needles to get rid of leakages.
Here are the steps for cleaning the exit needle located at the bottom of the pod holder.
- Open the lid of the machine and remove the pod holder.
- Then, remove the funnel from the bottom of the pod holder.
- Take a paper clip or sewing needle and move it around inside the tube to get rid of any kind of debris.
- Using warm, soapy water, wash the pod holder and funnel.
Follow these instructions to clean the top needles present beneath the Keurig head.
- Turn the machine off.
- You will find the top needles under the head of the machine.
- Take a paper clip or sewing needle and insert it into the holes of the needle. Remove debris by moving the clip around.
3) Broken or loose upper gasket
Another reason for the Keurig machine leaking from the top is because of a broken or lost Gasket. The gasket is a part that is made of silicon that tightly holds the K-cup and water hose of the Keurig coffee machine.
The gasket seal on the puncture needle often gets broken, and this dislocated gasket seal can cause leakage in your Keurig coffee machine.
Solution
Ensure to align the gasket properly by closing any gap between the K-cup and the puncture needle to prevent top water leakage.
Follow these simple steps for repairing the upper gasket.
- Open the head of the machine.
- You will find the gasket around the entrance needles.
- Check if the gasket is fine or if it is bent or broken.
- You can take it out by pulling around the edges. If it’s broken then replace it with a new one.
4) Defective Pod holder
The pod holder of your Keurig machine might get damaged with time. If you see some bents on the pod holder or if the lid of your machine is not closing properly the defective pod holder is the issue.
This is a common problem with older Keurig machines. Over time, heat or using low-quality capsules can damage the pod holder.
Solution
You can buy a new pod holder compatible with your machine online. Replacing the pod holder with definitely solve this issue.
5) Damaged Internal pipes | Keurig leaking water when preheating
If your Keurig is leaking when preheating and the gasket and pod holder are fine then it might be due to damaged internal pipes.
Solution
To check if there is a leakage inside the water tubes you have to completely disassemble your machine and run a brew cycle.
Do this only if you are experienced in working with electronics otherwise seek help from a technician.
Never do this if your machine is still in a warranty period because disassembling the machine will void the warranty of your machine.
Coffee leakage from the Keurig machine
If your machine is leaking coffee then these three might be the culprit behind this issue.
1) Fault tube connector and worn-out filters
Faulty tube connectors and worn-out filters are two primary reasons for coffee leakage in Keurig.
Solution
The ultimate solution is to replace the old tube connector and filter with the new one.
2) Usage of Defective Capsules
Defective capsules are also the cause of coffee leaking from the top of the Keurig coffee machine.
Using cheap low-quality capsules, or reusable capsules that don’t perfectly fit in the pod chamber can lead to leakages.
The reason is these capsules sometimes have a thicker foil, and that foil can’t be fully penetrated by the needles of your Keurig machine.
Solution
The easiest solution is to use coffee pods from reputable brands.
3) Overfilling the coffee grounds
Overfilling the reusable capsules with coffee grounds causes the leakage of coffee from the top as water doesn’t find enough space to pass through the capsule.
If you are trying to make a stronger cup of coffee then you must choose a smaller cup size instead of overfilling the capsule.
Solution
Never overfill the capsules with coffee grounds
Final Thoughts
So, in this article, we have discussed all possible reasons why is your Keurig leaking and how you can repair or fix them.
If you have applied all these tips and still your Keurig is leaking then your machine might have some more complicated issues like a damaged water pump or heating element. Diagnosing and solving these issues are not very easy.
You can also try draining your Keurig if the problem persists!
You have to seek help from some technician or Contact Keurig support to seek professional assistance.
FAQs
How long do Keurigs last?
The average lifespan of a Keurig machine is 3 to 5 years. However this mainly depends on the user, You can certainly extend the life of your machine if you take care of it and clean and descale it regularly.
How often should you clean a Keurig?
Ideally, you should clean the pod holder, Puncture needles, and the water reservoir of your machine at least weekly. And you should descale the Keurig once every three months.
Related Keurig Troubleshooting Guides

Has anyone tried taking the whole machine apart to deep clean it? I’ve heard that can solve some stubborn leaking issues. Seems like a hassle though.
I haven’t done it myself, but opening up the machine will help you find the root cause of the leak and eventually fix it. If you are not expert I recommend seeing some technician as there so many intricate parts that you can break!
Leaks are the worst, but these tips gave my Keurig a new lease on life. Gonna stay on top of cleaning from now on!
Yeah regular cleaning and descaling is a must