Pulling cafe-quality espresso shots requires some skill. But don’t let an espresso machine intimidate you. With a basic understanding of how these machines work and what each component does, even a beginner can create top-notch espresso like a pro.
Whether you want strong and intense espresso shots or you want to add water or milk to make other types of coffee such as Americano, Latte, Cappuccino, etc, You will find all in this article.
You’ll learn how to dial in the grind size, adjust the pressure and steaming wand, properly clean your machine, and pull flawless shots every time.

So, let’s get to know your machine first. Because knowing your Espresso machine is the first step to brewing a perfect shot of Espresso.
Parts of an Espresso machine
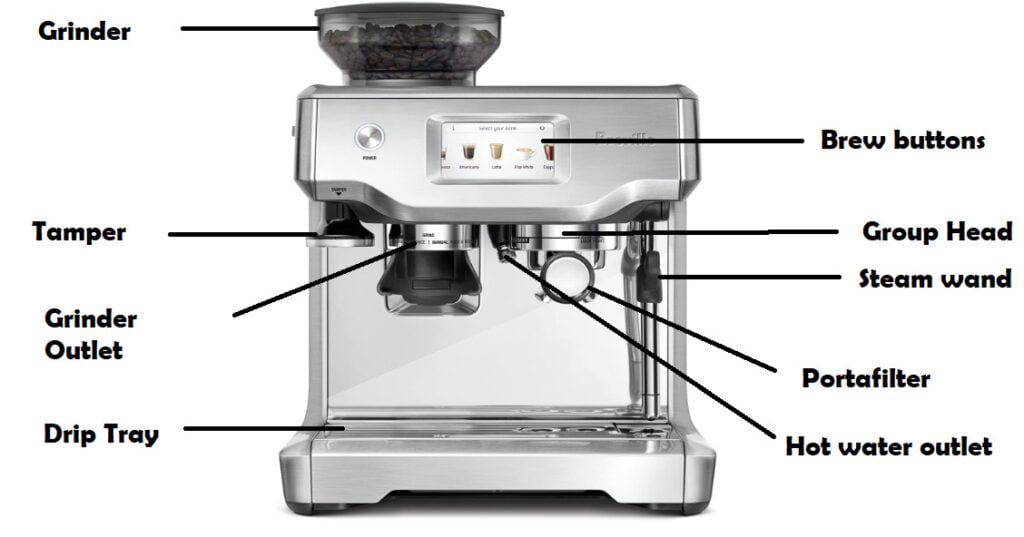
1. Portafilter
Espresso portafilters are the metal handles that hold the Coffee ground Basket.
Portafilters come in a variety of designs and types. Two main types are pressurized and non-pressurized, based on their working principle. There are also two main design types: naked and spouted.
Here’s a detailed guide on types of Espresso portafilters
2. Group Head
The group head is responsible for distributing hot water into the portafilter. It essentially serves as the bridge between the espresso machine and the coffee grounds placed in the filter basket.
Domestic Espresso machines usually have only one group head, while commercial machines have several.
3. Steam Wand
Most modern espresso or coffee machines come with a steam wand that hangs off to one side.
This wand forces steam into the milk, enriching it with air and producing the luxurious foam to make frothy milk-based espresso drinks like cappuccino.
4. Tamper
A tamper is a small tool used to compact the ground coffee in the portafilter basket before brewing espresso.
It is usually made of metal or plastic and has a flat base that evenly distributes and compresses the coffee grounds.
5. Brew Buttons
Brew buttons are usually found on the front panel and allow users to start and stop the extraction.
Depending on the design of the machine, these buttons offer options for single or double shots, pre-programmed volumes, or manual control over the extraction time.
6. Hot water Outlet
This is the separate outlet for hot water for preparing other diluted Espresso drinks like Americano or Long black. Not all Espresso machines have this function.
7. Drip Tray
The drip tray in an espresso machine is a removable tray located at the bottom to collect excess water and coffee drips during the brewing process.
8. Grinder
The grinder is responsible for grinding coffee beans to fine settings, a key factor in espresso extraction.
Not all espresso machines have a built-in grinder. However, it’s a very useful additional feature.
what kind of coffee you should use for Espresso?
First up, you’ll want to use a dark-roasted coffee for Espresso. The darker roast gives you that rich, intense flavor that espresso is known for. Go for a roast like French, Italian, Espresso, or Vienna.
Stay away from lighter roasts like cinnamon and medium roasts like breakfast blends – they just don’t have the bold coffee flavors you need.
As for the bean, a nice blend of Arabica and Robusta is your best bet. The Arabica provides the complex and fruity flavors while Robusta provides the depth and the thick Crema layer.
Pure Arabica beans can work too, if you want a less bitter and more sweet taste in your cup. Opt for beans from places like Brazil, Sumatra, and Colombia, – they grow some of the best coffee beans for espresso.
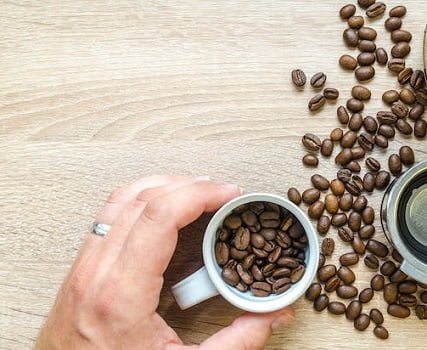
And don’t use pre-ground coffee! Always buy whole beans and grind them fresh right before you brew. Fresh whole bean coffee is crucial for flavor since ground coffee gets stale super fast.
“There is a simple rule for coffee aficionados: Grind within 15 days of roasting and brew within 15 minutes of grinding.“
Invest in a quality burr grinder, dial in fine grind size, and grind beans every time you brew.
Check out the list of Best Tasting Espresso Beans
step-by-step guide to Using an Espresso Maker
Using Espresso machines is not as easy as using a drip coffee machine it requires some practice and skills.
Here’s a step-by-step guide on how to use an Espresso machine for pulling perfect shots.
Step 1: Prepare your Espresso Machine
Fill the water reservoir of your Espresso machine and Plug in the Machine. The Machine will start heating the water and the light will Pop up once it’s ready.
You can proceed to grind the beans while the machine is preheating.
If you’re a perfectionist, press the start button and let the hot water flow through the group head. This will swiftly preheat your machine, ensuring it reaches the ideal brewing temperature before you pull the real shot.
Step 2: Set Temperature And Pressure
Not all Espresso machines give you the option to set the temperature and pressure manually. If your machine doesn’t have this option then you can safely skip to the next step.
If your machine has this setting then you must know that the ideal temperature for brewing Espresso is between 195 to 205 degrees (that is slightly lower than the boiling point of water). And the recommended pressure for Espresso is 9 bars.
Step 3: Grinding Coffee Beans
Grinding the Coffee beans to perfect settings is the most crucial step in making Espresso, as it can easily make or break your Shot!
The grind size affects how the water extracts flavors from the grounds. Too coarse, and the water will pass through too quickly, resulting in under-extracted, weak coffee. Too fine, and the water might struggle to flow, leading to over-extraction, and causing bitterness.
For espresso, you need a fine, powdery grind – we’re talking powdered sugar texture here.
This fine grind provides the right amount of resistance for the pressurized water to extract all the oils and flavor compounds when brewed.
You can also use pre-ground Coffee beans if you don’t have the time or equipment for grinding. But then you have to compromise on the taste.
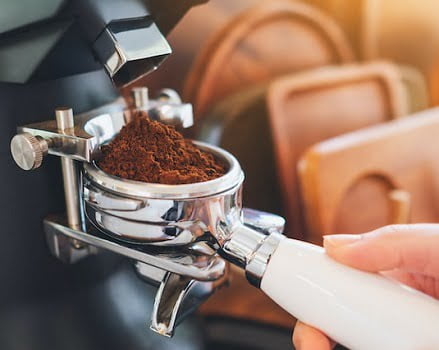
Step 4: Weigh the Ground Coffee
Now it’s time to actually dose coffee grounds into the portafilter basket or you can also grind straight into the basket.
You’ll wanna use a little scale to weigh your grounds. For a single shot, dose around 7-9 grams of coffee. For a double shot, dose 14-18 grams. Precision is key here – too much or too little coffee will throw off your extraction.
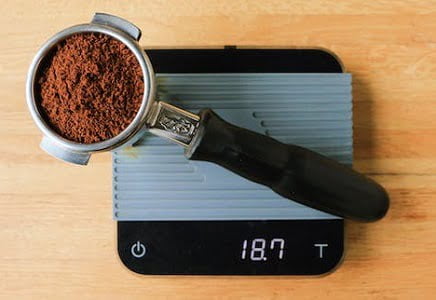
Espresso machines usually come with two different-sized portafilter baskets – one is smaller for dosing the coffee grounds for a single shot, and one is larger for dosing the grounds for a double shot.
Make sure to use the single basket for singles and the double basket for doubles.
Underfilling the double basket or overfilling the single basket can lead to uneven water flow and incorrect extraction.
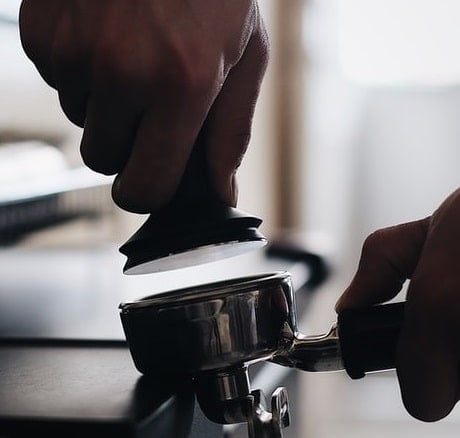
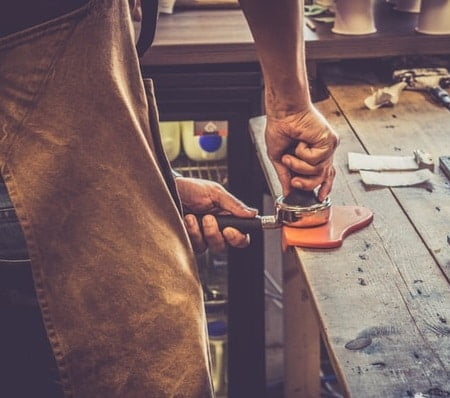
Step 5: Tamp the coffee grounds
Alright, you’ve got your portafilter loaded up with finely ground coffee. Now it’s time to tamp those grounds down nice and snug before brewing.
After filling the basket, gently level off the surface with your fingers and apply firm pressure with the help of a tamper.
This packs the grounds tightly into a dense, consolidated puck.
Don’t go too hard while tamping, Just apply enough pressure until the grounds pushes back at you! The goal is to eliminate any air pockets or gaps in the coffee bed.
If you don’t tamp or tamp unevenly, the water just channels through the loose grounds and you get a weak, nasty shot.
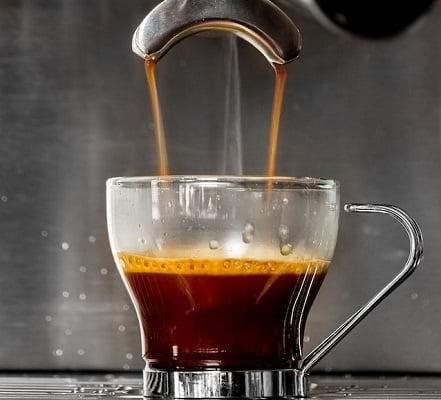
Step 6: Pull the Shot
It’s go time! Insert the portafilter in the group head and start the machine.
You’ve got a couple of options for starting the brewing process:
First, you can pull the shot manually. This means pressing the brew button to start the extraction, Let it run for 25-30 seconds, then press again to stop the brewing when you get your desired yield. You get full control to customize the shot volume and timing.
Second, you can use auto preset buttons for brewing single and double shots. Just press the single or double button and it’ll automatically brew a preprogrammed amount. Usually around 1 or 2 ounces.
The preset buttons definitely make it easy and mindless to brew, especially for beginners. But eventually, you’ll probably want the flexibility of manual pulling once you become a shot master.
A well-extracted espresso shot pours slowly and evenly from the portafilter spouts with a rich, caramel-colored crema layer on top.
Step 7: Dial in the Shot
Alright, you’ve pulled your first shot! Odds are, it won’t be perfect on the first try – no shade, it takes practice. Now comes the fun part: dialing in the shot to get it just right.
See, there are a lot of variables that go into a tasty shot: grind size, dose, tamp pressure, time, etc. You gotta mess around with all these to “dial in” the ideal flavor.
Start by examining your first shot.
Too bitter? Grind a little coarser. Too sour or weak? Grind finer to increase extraction. Adjust your dose up or down a gram too. If it pours too fast, tamp harder or try a finer grind.
Play around until you nail the sweet spot of full, rich flavor without harshness.
It can take a bunch of trial-and-error shots to get it dialed. But once you find your machine’s sweet spot, log all those settings!
Keep using what worked so your shots are consistent day-to-day. Stay aware too – you’ll need to re-dial after getting fresh beans or if you switch the roast.
Read a detailed guide on Dialing in Espresso
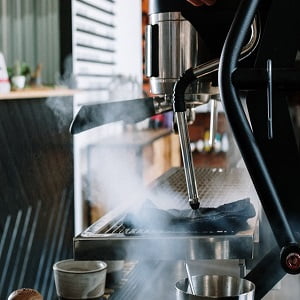
How to Steam the Milk with an Espresso Machine
You’ve pulled your espresso shot(s) like a boss. Now it’s time for the fun part – steaming up that creamy milk to pair with your liquid gold espresso.
Fill your metal steam pitcher with cold, fresh milk. Whole milk works best since the fat makes it steam up all lush and silky.
Submerge the steam wand tip just below the surface and turn on the steam power. This injects air bubbles and makes the milk spin into a whirlpool.
When it gets bubbly and doubles in size after a minute or so, lower the tip deeper into the milk to reach the desired temperature.
Shut off the steam just before the pitcher gets too hot to hold comfortably. For making Cappuccino or Latte aim for the temperature in range 140 to 150 degrees.

Steaming milk takes some real technique to master, but just keep practicing. Soon you’ll be making cafe-worthy cappuccinos and lattes!
Final Thoughts
And that’s the full scoop on using an espresso machine to brew up magical shots in your own kitchen!
There are many different types of Espresso machines; fully automatic machines that do all the work to manual or semi-automatic ones that let you control every aspect.
Each type has its own techniques, but the fundamentals are the same – quality fresh-ground coffee, precise dosing/tamping, dialing in the grind, and learning the flow.
Let me know in the comments if you have any other tips or tricks for a novice home barista!
FAQs
Can you Make Espresso without a Machine?
No, you really can’t make true espresso without an espresso machine. The high-pressure extraction is key which can’t be replicated without a machine.
There are some manual hacks like using a Moka pot or Aeropress.
Learn about some methods to make Espresso without a machine
How to make Regular Coffee with an Espresso Machine?
Making regular coffee in espresso machine is easy – just add hot water!
Pull your shot, then top it off with 4-8 oz of hot water to turn your concentrated espresso into a Café Americano.
The closest thing to regular coffee you’ll get from an espresso maker!