The main reason to use a coffee scale is simple: it helps you make more consistent coffee.
A small change in grams can change how your coffee tastes, especially with espresso, pour-over, and French press.
Without a scale, it is easy to rely on scoops, guesswork, or habit. That usually means cups that taste different from one day to the next.
In this guide, I’ll show you how to use a coffee scale step by step, explain simple coffee ratios, and point out a few beginner mistakes that can make good coffee harder than it needs to be.
Why a Coffee Scale Changes Everything?
People often think a coffee scale is for someone who owns three kettles and talks about bloom all day long. But it isn’t. It’s for someone who wants their coffee to taste good on Monday and the same on Tuesday.
Coffee Is Built on Ratio
That usually comes down to ratio. Not talent, and not instinct either, at least not at first. Coffee is one of those things where a couple of grams can change the cup more than you’d think. If you add a little too much, it gets bitter and if you add too little, it starts tasting watery.
A Few Grams Really Do Matter
With espresso, it’s pretty obvious. You’ll notice it with pour-over and French press too. Even drip, though people forgive drip more. Small changes don’t look like much on a scale, but they show up in the cup faster than most beginners expect.
You Don’t Need to Get Weird About It
You don’t need to become obsessive. You just need basic accuracy, enough to stop guessing. After that, the process gets simpler, not more complicated. You weigh, you brew, you adjust more next time if needed, and that’s about it.
What You Actually Need (Simple Setup, No Overthinking)
This part sounds bigger than it is. You don’t need a shelf full of gear and a notebook full of brew logs. You need a way to stop guessing, a way to track time, and the setup you probably already use at home.
Digital Scale
For espresso, 0.1g precision is better because small changes make a bigger difference here. For pour-over, French press, or drip, a scale that reads in 1g steps is enough to help you make more consistent coffee.
If you want a coffee-specific scale, I’d start with Timemore’s Basic 2.0. It reads in 0.1g increments and includes an automatic timer.
The Hario V60 Drip Scale is another solid option, especially if you make filter coffee often. It has a built-in timer and gives you the accuracy most home brewers need.
Timer
You don’t need to buy a separate timer unless you want one. If the scale has a built-in timer, use that. If not, your phone is fine. The regular stopwatch works. So does the timer app you already ignore for everything else.
Your Usual Coffee Setup
That is really it. Your brewer, a grinder if you have one, the kettle already sitting in your kitchen, whatever mug you reach for without thinking. You don’t need to spend money on upgrades. Just start with what you already have, then see if anything is actually missing.
The One Concept That Makes Everything Easier: Coffee Ratios
Once you understand ratios, coffee becomes less random. You stop guessing and start making cups that taste more consistent from one day to the next.
What is a ratio actually?
A ratio is basically coffee to water. For instance, if someone says 1:2 for espresso. They mean one part coffee to two parts liquid espresso out. So if you put in 18 grams of coffee, you are looking for around 36g in the cup.
For drip or pour-over, the ratio looks more like 1:15 to 1:17. If you use 20 grams of coffee, you want about 300 to 340 mL of water. This depends on how strong or light you prefer it.
A Few Starting Points
For espresso, 1:2 is a standard starting point. Some coffees taste better a little shorter and others, a little longer. If you are new, I wouldn’t start wandering too far too soon.
For drip and pour-over, 1:15 will taste a bit stronger, while 1:18 leans lighter. And a French press can sit in that same general range too. Not exactly the same every time, but close enough to be useful.
Why Ratios Matter More Than Recipes?
A recipe can tell you to use 18 grams of coffee and 300 mL of water. But what if tomorrow you want to make a little more, or a little less, or you switch mugs because the other one is still sitting in the sink?
That same 1:16 ratio can scale up or down without making you start over. Maybe it’s 15 grams of coffee and 240 mL of water. Or it’s 25 grams and 400 mL. Same idea, different amount.
Recipes are fixed, but ratios move with you.
Next time your coffee tastes too strong, you know where to look. If it tastes too weak, same thing. You’re not guessing whether the scoop was full or whether your pour-over just happened to turn out well.
Step-by-Step: How to Use a Coffee Scale (Your First Brew)
The first time you use a coffee scale, it can feel like you’re overdoing it just to get a cup of coffee. But after a brew or two, pressing the button and weighing things becomes more normal than guessing with a scoop.
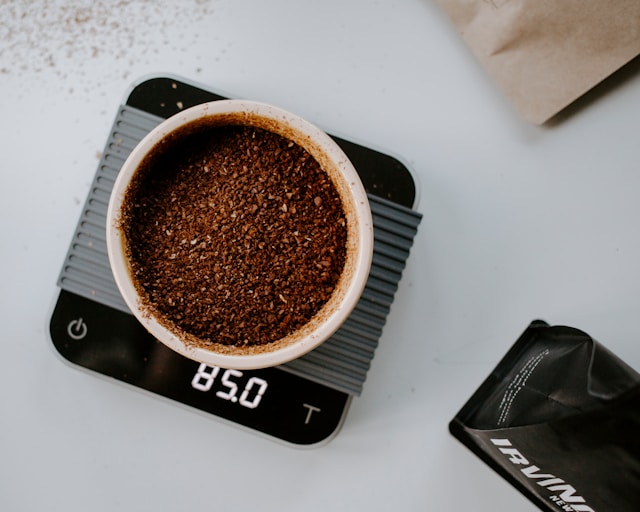
Step 1: Weigh Your Coffee Beans
Start with the coffee.
For a double espresso, a common starting point is 16-18 grams. For pour-over, 20 grams is a good number because the math stays friendly.
This matters more than scoop size because scoops lie. One scoop of dense, dark coffee isn’t the same as one scoop of lighter beans, and it isn’t the same if one day you fill it high and the next day you don’t. People think they are repeating themselves when they are not. That is usually the problem.
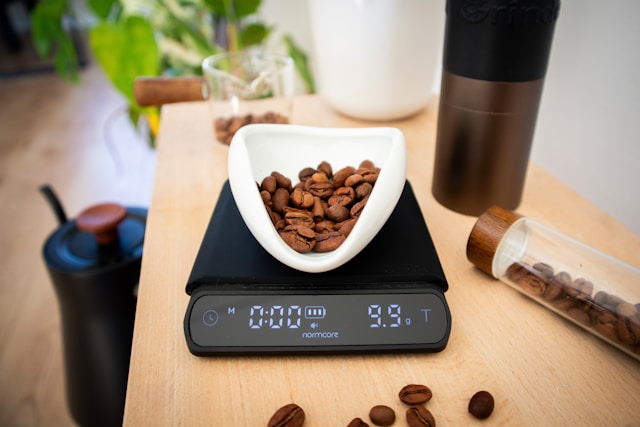
Step 2: Tare the Scale
Once the coffee or brewer is sitting on the scale, press tare. This zeros out everything. You are basically telling the scale to ignore whatever is already sitting on it and only measure what comes next.
It sounds small, but skip it once and you will see how quickly things drift. Suddenly, the number on the screen includes the dripper, the mug, maybe a few drops of old rinse water if you were moving too fast.
Step 3: Add Water Based on Your Ratio
If you are pulling espresso and start with 18 grams of coffee, you are aiming for around 36 grams out. That is your 1:2 ratio. Watch the scale as the espresso runs and stop it around there. Not ten seconds later, or it can turn thin and watery.
For pour-over, if you started with 20 grams of coffee, you are aiming for around 300 to 340 grams of water, depending on how strong you want it. 300 grams will taste fuller, while 340 grams lightens things up. Same coffee, different feel in the cup.
Step 4: Use Time as a Secondary Guide
For espresso, a shot often lands somewhere around 25 to 30 seconds. Now for pour-over, you want around 2 and a half to 3 minutes. That gives you something to compare against, which is useful when you are new and everything still feels a little slippery.
But remember, time is not the main target. The ratio comes first. Taste tells you the rest. Still, time helps you notice when something is drifting.
If your espresso hits the right yield in fifteen seconds, something is probably off. If your pour-over is still dripping at four and a half minutes, something is probably off there too.
Step 5: Adjust Based on Taste, Not Perfection
If the coffee tastes too bitter, it probably means you pushed extraction too far. Go a little coarser, shorten the shot, or use a touch less water through the coffee, depending on the method. If it tastes too sour, go the other way. You should grind a little finer, let it run a bit longer, or extract a little more.
A big mistake is changing five things at once. Make one change, then brew again.
That is the part that helps most. Just one clear adjustment, then another if needed. The beans might still bounce off the scale once or twice. That part never fully goes away.
3 Common Mistakes Beginners Make
Most beginners aren’t doing anything crazily wrong. It’s often one small thing, then another, then the coffee tastes off. Then, if you’re like me, you blame the beans, or the grinder, or the machine, or maybe all three before breakfast.
1 – Using Volume Instead of Weight
A scoop feels simple, and it is simple, but not reliable. One day the scoop is rounded, the next day it is flat, then the beans are denser than the last bag. The “same” coffee isn’t the same at all. I used to do this with an old metal spoon that had somehow become part of the routine. It wasn’t helping.
2 – Chasing Perfection Too Early
Many beginners taste one cup, decide it is not perfect, and start acting like something has gone badly wrong. Commonly, it’s not the case. But the coffee might be a little heavier or thinner, and it needs a small nudge, not a complete rework. There is a stage where “pretty good” is exactly where you should be.
3 – Not Writing Down What Worked
This one sounds boring until you make a cup you enjoy and then forget what you did the next morning. It doesn’t have to be some special notebook. A note on your phone is enough. Even a scruffy piece of paper near the grinder works.
Quick Reference: Simple Ratios to Start With
This is the part worth saving. You may want to screenshot it, bookmark it, or write it on a note near the grinder if you want.
| Brewing Method | Simple Starting Ratio | What That Looks Like |
| Espresso | 1:2 | 18g coffee → 36g espresso out |
| Pour-over | 1:16 | 20g coffee → 300mL water |
| French press | 1:15 | 20g coffee → 300mL water |
| AeroPress | 1:15 to 1:17 | 15g coffee → 225mL to 255mL water |
| Drip coffee | 1:15 to 1:17 | 20g coffee → 300mL to 340mL water |
| Cold brew | 1:5 concentrate | 100g coffee → 500mL water |
A small tip: these are starting points, not something set in stone. If a pour-over tastes too light at 1:16, go a notch stronger next time. If a French press feels too heavy at 1:15, stretch it out a bit. That is the nice thing about ratios. Once you have somewhere to begin, adjusting gets easier.