Pour Over is a manual and one of the oldest coffee brewing methods. It involves pouring hot water over the coffee grounds placed in the filter. The water extracts flavors as it passes through the coffee grounds and drains into the cup. Pour over allows complete control and precision, bringing out incredible flavors and aromas that simply can’t be replicated by automatic drip machines.
Pour over is well-liked by coffee enthusiasts and arguably makes the best tasting black coffee drink with simple and smooth flavors. From delicate floral notes to vibrant fruit undertones, each sip is a delightful experience for your taste buds.
In this guide, I’ll walk you through the essentials: the right gear, precise grind sizes, optimal water temperatures, and most importantly, the pouring techniques that’ll transform you into a pour-over pro.

What do you need to make Pour Over Coffee?
Here are some essential equipment that are required to make Pour Over Coffee at home.
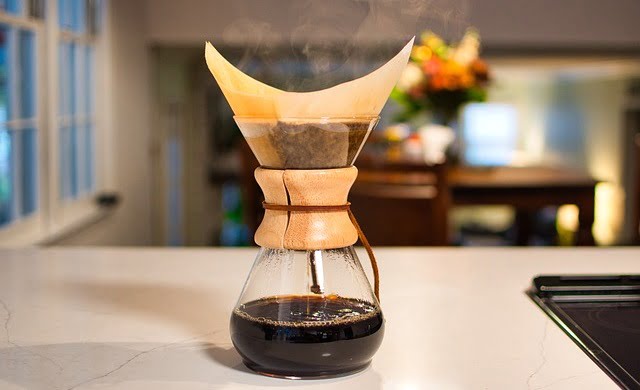
1. Pour Over Brewer
A pour-over brewer is a cone or cylindrical-shaped vessel usually made of glass. You can find different types of Pour Overs like Hario V60, Kalita Wave, Chemex, Melitta, Clever Dripper, etc. These types vary in their shapes; some have a steep taper, some have a gentler slope, some may have a pointed triangular bottom, and some have a flat base.
I like the classic Mellita design that has a wide opening at the top and narrows toward the bottom.
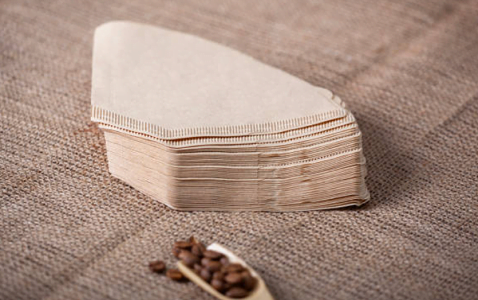
2. Paper Filters
Paper filters are the most common choice for pour over brewing. They come in bleached and unbleached varieties. Unbleached paper filters are generally preferred as they don’t impart any unwanted flavors or aromas to the coffee. Paper filters are designed to fit snugly in the pour-over brewer and allow for efficient extraction while trapping most of the coffee oils and sediments.
You can also use Cloth filters as reusable alternatives to paper filters for making pour over coffee. They are good at filtering and do not affect the flavor of the coffee. However, cloth filters require more thorough cleaning to prevent any residual flavors or oils from impacting subsequent brews.
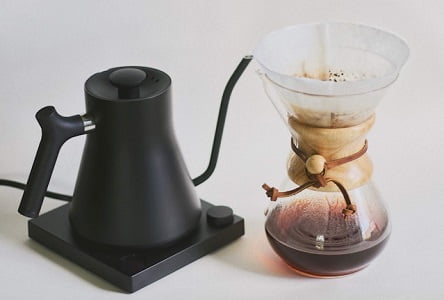
3. Electric Kettle or heating source
You’ll need a way to heat water to the ideal brewing temperature, typically around 200°F (93°C). An electric kettle with temperature control is super handy, but you can also use a stovetop kettle or pot.
4. Coffee Grinder
For the best flavor, it’s recommended to grind your own whole bean coffee right before brewing. A burr grinder will give you a consistent, even grind.
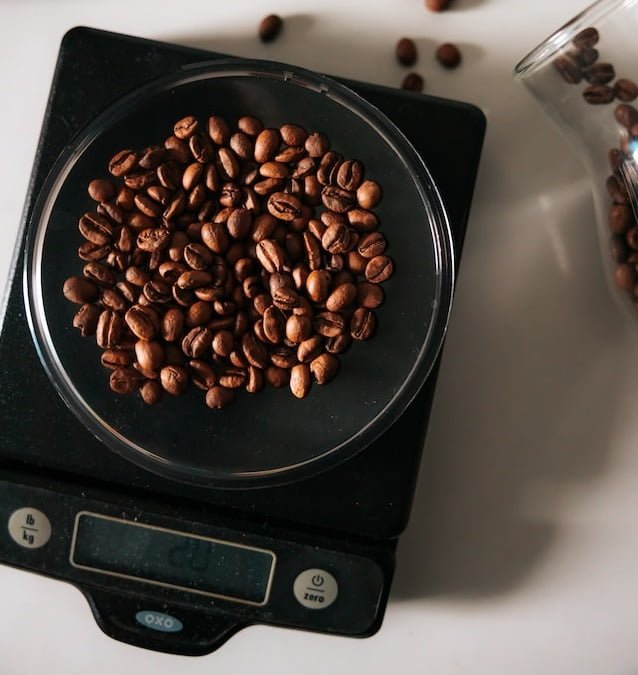
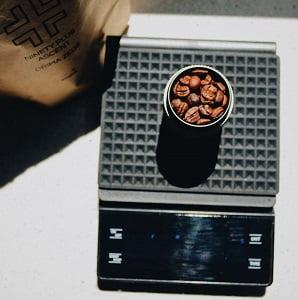
5. Coffee Scale (Optional)
A Coffee scale can help you measure the coffee grounds and water precisely for a consistent cup every time. While it’s not necessary precision is key for pour-over brewing.
How to Make Pour-Over Coffee
Here are detailed instructions on how to make the best Pour Over Coffee at Home!
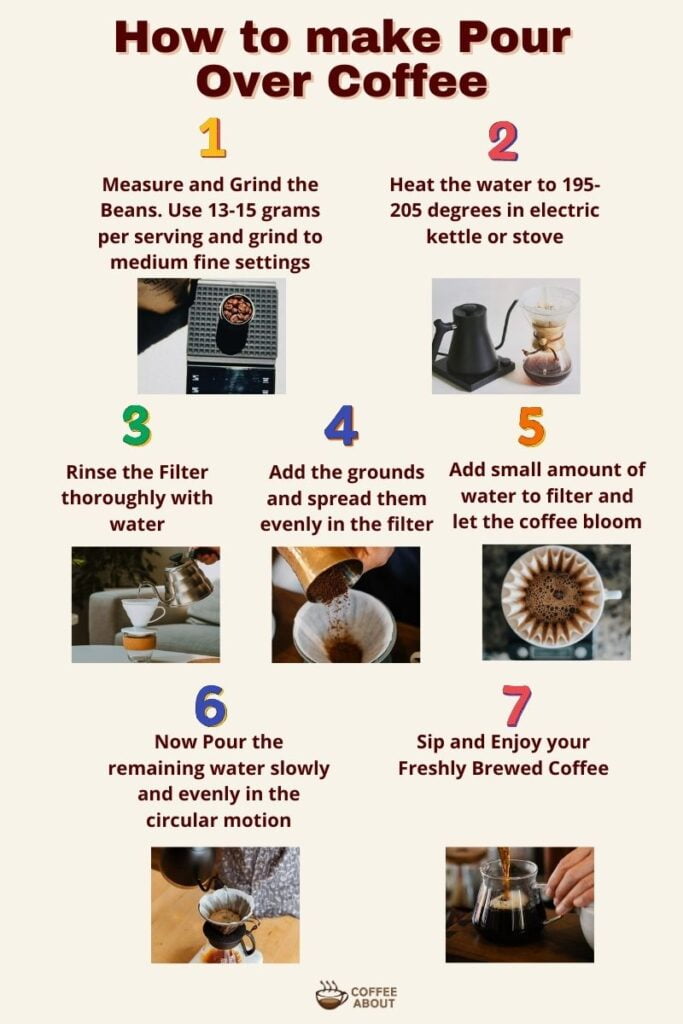
1. Weigh and Grind the Beans
The first thing you want to do is weigh out your coffee beans. Use 13-15 grams of coffee ground for an 8 oz mug of coffee. Once you’ve measured the beans, it’s time to grind them.
The best grind size for Pour Over is medium-fine consistency, like granulated sugar or salt. Too fine and the water won’t be able to flow through properly, too coarse and you’ll leave those delicious flavors under-extracted.
What is the best Coffee-to-water ratio for Pour Over?
The best Coffee to water ratio i-e the Golden ratio for Pour Over is 1:18 which means 1 gram of coffee for every 18 mL of water. It’s a good starting point for making a balanced and flavorful cup of coffee. However, you can tweak the ratio based on factors like roast level, grind size, and personal taste.
2. Heat the water
Start by measuring the amount of water you’ll need for your brew. You’ll want to heat your water to somewhere between 195°F-205°F (91°C-96°C). Any cooler and the coffee won’t extract properly, any hotter and you’ll scorch the beans.
Tip: That’s why I recommend using an electric kettle with temperature control settings for dialing in that sweet temperature spot. But you can also boil the water on the stove and let it cool for around a minute so that it reaches the ideal temperature.
3. Rinse the filter
Fold the paper filter and put it in the pour-over brewer. Give it a quick rinse with hot water before brewing.
This might seem like an unnecessary step, but giving your filter a quick rinse is actually really important for a few reasons.
- First off, it helps remove any papery residue or dust that could impart off-flavors to your brew.
- Secondly, rinsing the filter allows it to better adhere to the brewer’s walls. This prevents the filter from shifting around and creating an uneven extraction.
- Thirdly, rinsing helps pre-heat your brewer, This helps maintain a stable brewing temperature brewing.
4. Add Ground Coffee
It’s time to load those freshly ground beans into the paper filter. Spread the grounds evenly into the filter to create a flatbed. This helps promote uniform extraction and ensures that all the grounds are saturated evenly when you start pouring the water.
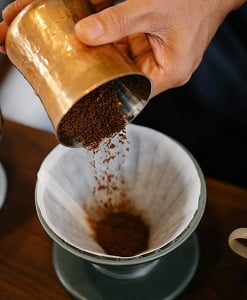
Tip: If you want to get really nitpicky, you can gently level out the grounds with a paper clip or toothpick to ensure an absolutely even extraction. But for most of us, giving the brewer a few taps on the counter works just fine.
5. Add a small amount of water and let it bloom
With your ground coffee neatly bedded in the filter, it’s time for the first pour – but just a small amount to start. Slowly pour just enough water to saturate the grounds, around 2-3 times the weight of the coffee itself.
Then just let it sit for 30-45 seconds. This is called the “bloom” and it’s an important step that many overlook.
During the blooming phase, the initial pour causes carbon dioxide gases trapped in the coffee to start escaping. You’ll actually see the grounds puff up and expand as they release these gases.
The blooming process helps degas the coffee, which in turn promotes more even extraction when you pour the rest of the water. During blooming, you’ll notice a rich, earthy aroma filling the air—a tantalizing preview of the delicious coffee that’s yet to come.
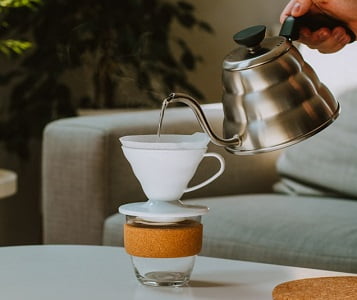
6. Add the remaining water
With the bloom complete, it’s time for the main pour. This is where you’ll add the rest of your heated water to fully saturate the grounds and extract all those delicious flavors.
The key here is to pour slowly and evenly, starting from the center and moving outward in a circular motion. This helps ensure an even, well-extracted brew.
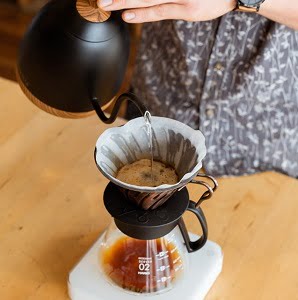
Tip: This is where having a gooseneck kettle really comes in handy. The narrow spout and curved neck allow for a slow, controlled, and consistent pour rate. But you can also use a regular kettle – just take it nice and slow.
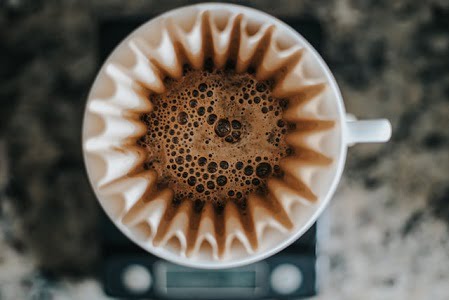
7. Enjoy your Coffee
Once all the coffee is done dripping through the filter, toss it out. Then, pour the coffee into your favorite mug and enjoy!
Read a Guide on 14 Ways to Make Coffee
WHat are the Best Pouring Techniques for Pour Over Coffee?
The way you pour water over the coffee bed significantly impacts the extraction process and brew time.
There are two primary pouring patterns: circular pour and center pour. There are also two primary pouring techniques: pulse pour and continuous pour.
Circular and Center Pouring
The circular pour technique involves pouring the water in concentric circles, while the center pour focuses on the stream in the middle of the coffee bed.
In general, a center pour tends to result in a slightly longer brew time compared to a circular pour. This is because the center pour leaves some grinds high and dry, leading to potential under-extraction in those areas.
I always recommend doing a circular pour for even extraction. However, for certain brewers and shapes and for a low coffee dose center pour works better.
Pulse and Continuous Pouring
Pulse pouring involves pouring the water in multiple, deliberate pulses instead of a continuous stream. For example, you can pour water in 5 steps while waiting for 10-20 seconds between each step. This technique can help prevent channeling and generally leads to a longer brew time.
Continuous pouring, on the other hand, involves pouring the water at a constant, steady flow rate without interruptions after the bloom period. The aim is to maintain an even saturation and flow throughout the brewing process.
There is nothing wrong with either pouring technique, but I prefer continuous pouring when making a single serving because it results in a more consistent taste and avoids introducing new unnecessary variables. However, mastering continuous pour is rather difficult as the flow must remain slow and consistent throughout the process and it can be a real pain especially when you are making larger servings.
It’s also crucial to consider the pouring speed and height. Pouring too fast or from a high distance can increase agitation, leading to an inconsistent and prolonged brew time. Aim for a slow, controlled pour from a lower height to minimize agitation and maintain a consistent brew time.
How to tweak Extraction in Pour Over?
Now, let’s discuss into the various factors that can affect extraction in pour over brewing and how you can tweak them to adjust the flavor profile.
Why is Pour Over Coffee bitter?
If your Pour Coffee tastes bitter, you might be:
- Using too fine coffee grounds
- Using a high coffee dose
- Using too hot water
Why is Pour Over Coffee weak and Sour?
If your Pour Coffee tastes weak, you might be:
- Using too coarse coffee grounds
- Using a low coffee dose
- Using too cold water
1. Choose the Right Grind Size For Pour
The right grind size for Pour Over is Medium Fine or Fine with a consistency of table salt or fine sand. This grind size allows for a reasonable flow rate and adequate extraction of flavors from the grounds.
When you grind coffee too fine, it takes longer for water to pass through it, which makes the coffee stronger and bitter. And when you grind it too coarse, the water passes through too quickly, and you end up with coffee that lacks flavor and body.
You also have to adjust the grind size based on the roast profile of the coffee. For lighter roasts, use a little finer size than normal as light roasts extract flavors slowly, and for darker roasts, use a little coarse grind size to avoid bitter flavors.
2. the Right Water Temperature for Brewing Coffee
Water temperature is another important factor that influences extraction. The best temperature for brewing coffee according to the National Coffee Association is around 195-205°F.
If you use boiling water, it can cause over-extraction and bitterness. Cooler water (around 185-195°F) slows down the extraction process, resulting in a lighter, more delicate flavor profile. However, if the water is too cold it will leave the drink under-extracted with sour flavors.
Experiment with different temperatures to find the sweet spot for your desired flavors. For lighter roasts, start from the higher end i-e 205 degrees, and for darker roasts start from the lower end i-e 195 degrees.
3. Dose and Brew Ratio
The amount of coffee you use (dose) and the ratio of coffee to water affect the strength and intensity of the brew, obviously though.
Adjust the dose and brew ratio to find the balance that suits your taste preferences. The best ratio as discussed above is 1:18. I use 1:18 for lighter roasts while for medium and medium dark roasts I increase the coffee ratio to 1:15 for more depth and sweeter flavors.
What are the best Coffee beans for Pour Over Coffee?
When selecting coffee beans for pour over brewing, consider sourcing from reputable roasters or specialty coffee shops that prioritize freshness and quality. Additionally, look for tasting notes that describe the coffee as complex, fruity, or floral, as these profiles lend themselves well to the pour over method.
1. Go for lighter roasts
Light or medium roasts are generally preferred for pour over coffee. Darker roasts tend to burn off the delicate flavors and aromas that make pour over coffee enjoyable. With lighter roasts, you can appreciate the coffee’s natural complexity, fruitiness, and floral notes, which are often lost in darker roasts.
Leave those darker roasts for concentrated Espresso shots.
2. Specialty Single Origins
Single-origin specialty coffee beans are an excellent choice for pour over brewing. These beans are typically sourced from high-quality producers and offer a unique flavor profile specific to their region. Avoiding cheap blends is recommended as they often lack the depth and complexity that makes pour over coffee shine.
As for which single origin coffee is best, that’s a matter of personal taste. I recommend using beans from African or Central American region as they are naturally sweet and makes a truly delicious cup of coffee.
Also read: What country has the best Coffee
Final Thoughts
Pour over coffee is an art form that allows you to unlock the true potential of your beans. With a little practice and the right techniques, you can craft a delightfully nuanced coffee drink that outshines anything from your automatic machines.
Now it’s your turn – what are your top pour over tips and tricks? Or if you’re new to the game, what questions do you still have? Drop a comment and let’s nerd out over crafting the ultimate cup. Happy brewing!
Also read:
- How to make Coffee in a Percolator
- How to make Vietnamese Coffee
- How to Make Turkish Coffee
- How to Use a Moka Pot
- How to Cold Brew Coffee
- How to Make Greek Coffee
FAQs
Can you make Iced Coffee in a Pour Over?
Yes, you can make Iced Coffee in a Pour Over. Just pour some ice cubes into your mug and pour hot coffee directly over it. The trick is to use a higher coffee-to-water ratio since the ice will melt and dilute the concentrate.
Is pour over coffee better than drip coffee?
The main difference between pour over and drip coffee is that pour over is a manual brewing method, while drip coffee uses an automatic machine but the brewing principle is exactly the same.
The pour over is better because you have complete control over every aspect – the grind size, water temperature, pour rate and pattern. This manual process allows you to precisely extract and highlight the nuanced flavors of the beans.

Super detailed and easy to follow — appreciate how you explained everything step-by-step without making it feel technical. I’ll definitely be trying pulse pouring next time. Thanks for the tips!