Roasting coffee beans at home is easier than you think. You take green, raw coffee beans and apply heat to unlock their hidden flavors, aromas, and oils. The process might seem intimidating at first, but you can start roasting with basic equipment you probably already have in your kitchen.
Home roasting gives you complete control over your coffee’s flavor profile. You decide exactly how light or dark to roast your beans. You can highlight bright, fruity notes with a light roast or develop rich, chocolatey flavors with a darker roast. Fresh-roasted beans taste dramatically better than anything you’ll find on store shelves (But of course, if you do it right).
In this guide, I’ll walk you through everything you need to know about roasting coffee at home. I’ll cover the basics, like choosing green beans, understanding roast levels, and using methods like a pan, oven, or popcorn popper.
First, Understand the Roasting Process
Roasting coffee is the process of turning green coffee beans into brown, flavorful ones. You apply heat to break down acids, develop sugars, and create the oils that give coffee its flavor and smell.
The beans go through distinct stages – drying, browning, and development – each creating different chemical reactions. Understanding these stages and the roasting temperatures helps you control the final taste and decide when to stop roasting for your preferred flavor profile.
The Chemistry of Roasting
Moisture Loss: Beans lose about 15-20% of their weight as water evaporates during roasting. This concentrates flavors and creates the porous structure.
Maillard Reaction: The Maillard reaction starts around 300°F and makes those brown colors and nutty flavors we love. This happens when amino acids and carbohydrates in the beans mix together under heat [1]. You get hundreds of new flavor compounds – like caramel, chocolate, and toasted bread tastes.
Caramelization: Around 340°F, the natural sugars in coffee beans start caramelizing like when you make candy or caramel sauce. This process creates sweet, rich flavors and adds to that amazing coffee smell. The beans turn from yellow to light brown during this step [2].
Pyrolysis: At higher temperatures, organic compounds break apart and form new molecules that create smoky, roasted flavors. This process kicks in during darker roasts and gives you those bold and intense notes.
Understanding these basics will help you control the roast and get the flavor you want in every cup.
Stages of Coffee Roasting
Here are some stages of roasting:
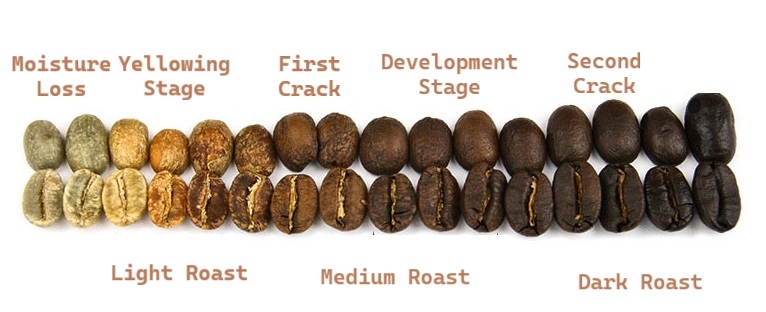
1. Drying Stage (4–8 minutes)
The green coffee beans enter the roaster at room temperature, carrying about 10-12% moisture content. Heat immediately starts evaporating this moisture while the beans gradually warm up. You’ll hear a gentle steaming sound as water escapes from the bean structure. The beans remain green during this initial phase, but you’ll notice a grassy smell.
2. Yellowing Stage (2–4 minutes)
The beans begin their first visible transformation, shifting from green to pale yellow. This initiates the Maillard reaction, which develops color and initial flavor. The beans might start giving off a smell like hay or toasted bread, which is quite different from the aroma of roasted coffee. Chaff (the outer skin) starts loosening during this stage.
3. First Crack (1–2 minutes)
In this quick 1 to 2-minute window, you’ll hear a distinct cracking sound, like popcorn popping. It’s caused by internal steam forcing its way out as cell walls break. The beans expand in size and shift from yellow to light brown. Steam and chaff start escaping more rapidly from the bean structure. This point marks the beginning of true coffee flavor development. Light roasts are usually stopped at or shortly after this stage.
4. Development Stage (1–3 minutes)
Right after the first crack, flavor starts developing rapidly. This stage lasts around 1 to 3 minutes, depending on your desired roast level. Light and medium roasts are typically finished during this phase. It’s where body, sweetness, and aftertaste take shape. The roaster controls heat and airflow to guide the beans toward their target flavor profile.
5. Second Crack (1-2 minutes):
Another series of cracks signals the beans entering darker roast territory. The pops sound different now – quieter and more irregular than the first crack. Oils begin migrating to the bean surface, creating that glossy appearance you see on dark roasts.
6. Dark Roast Territory
Beyond second crack, the beans enter the realm of dark roasts like French or Italian styles. The surface becomes increasingly oily and shiny as internal oils emerge. Flavors shift from origin-specific characteristics to roast-dominated notes like chocolate, smoke, and caramel.
Roasting Temperatures
Light Roast
Temperature: 356°F to 401°F (180°C to 205°C)
Time: Around 7–9 minutes
Light roast is roasted till the first crack – that popping sound when moisture escapes the beans. The beans stay light brown with no visible oils and retain most of their origin flavors, like fruity or floral notes. Light roasts go by different names: Cinnamon, Light City, Half City, and New England roast.
Medium Roast
Temperature: 410°F to 428°F (210°C to 220°C)
Time: 9–11 minutes
Medium roast is roasted past the first crack but stopped before the second crack begins. The beans turn medium brown with a balanced flavor that combines origin characteristics with roasted sweetness. Medium roasts are commonly called City, American, or Breakfast roast.
Dark Roast
Temperature: 437°F to 482°F (225°C to 250°C)
Time: 11–13 minutes or until the second crack
Dark roast is roasted through the second crack until the beans turn dark brown with visible oil on the surface. The roasting flavors dominate over origin flavors, giving you bold, smoky, and chocolatey notes. Dark roasts include Full City, Vienna, French, and Italian roast, getting darker and oilier as you go.
Roast Levels (Time/Crack Guide)
| Roast Level | Time After Start | Cracks Heard | Flavor Notes |
|---|---|---|---|
| Light (City) | ~6–8 min | End of first crack | Bright, acidic, fruity |
| Medium (Full City) | ~8–10 min | End of first → second | Balanced, chocolatey, sweet |
| Dark (Vienna/French) | ~10–13 min | Second crack ongoing | Bold, smoky, bitter-sweet |
The entire roasting journey typically takes 12-18 minutes, but skilled roasters adjust timing based on bean origin, desired flavor profile, and environmental conditions.
Read a guide on types of coffee roasts
5 methods of roasting coffee at home
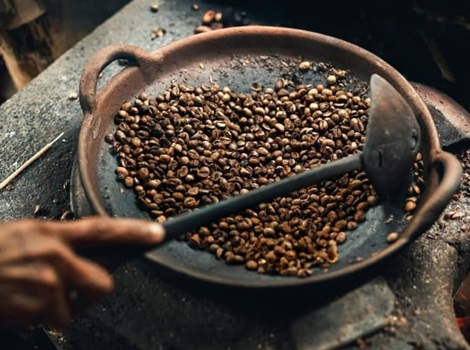
1. Pan on the stove
To roast coffee beans on the stove, place a heavy-bottomed pan (like a cast-iron skillet) on medium heat. Once the pan is hot, spread a single layer of green coffee beans on it. Stir the beans constantly with a wooden spoon or spatula to ensure even roasting and to prevent scorching.
As the beans heat up, they’ll turn yellow and emit a grassy smell. Listen for the first crack around 6 minutes, then continue stirring until you reach the roast level you want. Quickly transfer beans to a colander and shake to cool and remove chaff.

Tip: Roast in a well-ventilated area or under an exhaust fan, as this method produces smoke and loose bean skins (chaff).
Pros
✔️ Cheapest way to roast coffee
✔️ Most people already own a suitable pan and wooden spoon.
✔️ Perfect for trying different origins or roast levels without committing to large quantities.
✔️ This hands-on method teaches you the fundamentals of coffee roasting.
Cons
❌ Achieving perfectly uniform roasting is hard.
❌ Your kitchen fills with smoke, and chaff flies everywhere, creating a messy cleanup job.
❌ Requires constant stirring for 10+ minutes without breaks
2. Roasting in the Oven
You can use your home oven to roast coffee and get pretty decent roasted beans. Preheat your oven to 450°F and spread green coffee beans in a single layer on a perforated baking tray or sheet. Place that in the middle rack of the oven. Roast for 12-15 minutes, stirring every 3-4 minutes to ensure even browning.
You’ll hear the beans crack once around 8-10 minutes – this signals the start of a light roast. Keep roasting until you reach your desired color, from light golden to dark brown. Remove the beans and let them cool by spreading them on a flat surface or shaking them in a colander.

Pros
✔️ Most people already own an oven
✔️ Easy to control temperature
✔️ Can roast a decent batch at once
Cons
❌ Difficult to control and stir
❌ Harder to hear the first and second cracks
❌ Lots of smoke and chaff — makes your oven messy
3. Popcorn Machine
Get yourself a basic hot air popcorn popper – the kind without butter dispensers works best. Preheat the machine for 30 seconds, then pour in ½ cup or less of green beans (don’t overfill). The hot air will circulate the beans and roast them evenly as they tumble around.
Listen for the first crack around 4-6 minutes, which signals a light roast, and continue until you reach your preferred darkness.
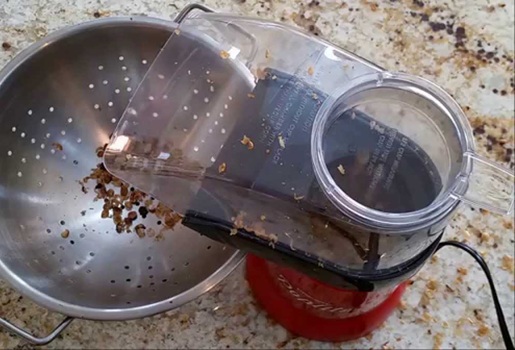
Make sure your popper has side vents, not a mesh bottom; mesh-bottom poppers can be a fire risk.
Pros
✔️ Inexpensive equipment ($20-30)
✔️ Good airflow helps even roasting
✔️ Built-in chaff removal
Cons
❌ Can overheat and damage the machine
❌ Limited batch size (small amounts only)
❌ No control over temperature
❌ Requires specific Popper models (Not all poppers are safe for this)
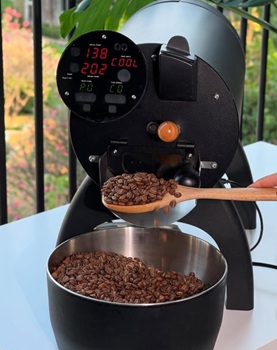
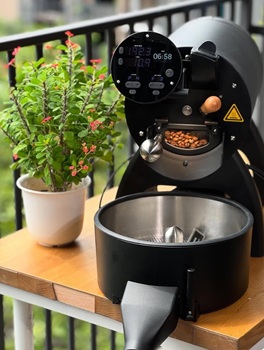
4. Home coffee roaster
Investing in a Home coffee roaster like Behmor or Gene Cafe roaster is the most precise and efficient method.
Preheat your home roaster to your desired roast temperature. Load the green coffee beans into the roasting chamber – typically 8 ounces to 1 pound, depending on your machine’s capacity. Select your roast profile from the digital controls or manual settings, then start the roasting cycle.
The machine automatically controls airflow and temperature and also completes the cooling cycle after the roasting process.
Pros
✔️ Consistent, repeatable roasting results every time
✔️ Precise control over temperature and timing
✔️ Built-in chaff collection and cooling systems
✔️ Can handle larger batches efficiently
✔️ Professional-quality roasts at home
Cons
❌ Higher initial investment ($200-1000+)
❌ Takes up significant counter space
❌ May require a learning curve for first-time users
Starting the roasting process
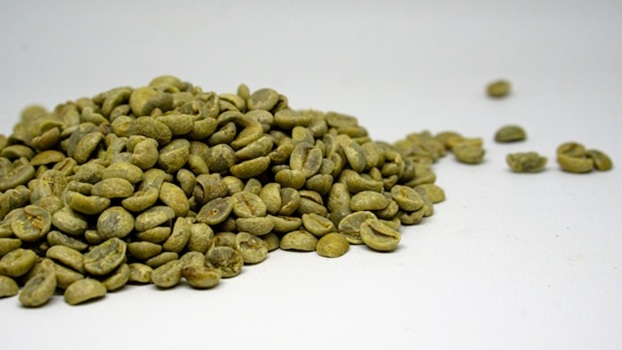
1. Buy the Green Coffee Beans
To begin roasting coffee at home, the first step is to purchase green, unroasted coffee beans. When selecting your beans, consider factors such as origin (e.g., Ethiopia, Colombia, or Brazil), bean variety (e.g., Arabica or Robusta), and flavor notes (e.g., fruity, nutty, or chocolatey). Each of these elements influences the final taste of your roasted coffee.
For quality and consistency, it’s best to buy from reputable sources. Trusted sellers like Sweet Maria’s, Bodhi Leaf Coffee Traders, or your local specialty roaster offer a wide range of options, each with detailed flavor profiles, to help you make an informed choice.
2. Set Up Your Roaster
Choose your roasting method: oven, popcorn machine, stovetop pan, or dedicated home roaster. Preheat your roasting equipment to the proper temperature (around 450°F for ovens, medium-high for stovetop). This helps create an even roast from the beginning.
3. Weigh and Clean the Beans
Measure how much coffee you want to roast. Weigh out the exact batch size your roaster handles best – typically 70-80% of maximum capacity for even heat distribution. Remove any defective beans, stones, or debris that could damage your equipment.
4. Load the Beans and Monitor Time
Add beans to your roasting device in a single layer. Keep them moving constantly – stir every 30 seconds for stovetop, every 2-3 minutes for oven roasting. Watch the color change from pale green to yellow to light brown. The beans will start crackling around 3-5 minutes.
Take notes on timing, temperatures, and any unusual observations that might affect your roast. Review your target times for first crack, second crack, and final development. Position yourself where you can easily hear the beans crackling and smell the developing aromas.
The ideal temperature for roasting coffee is typically between 350°F and 450°F (180°C–250°C), depending on whether you prefer a light, medium, or dark roast. Going hotter than that can burn the beans on the outside while leaving the inside underdeveloped, which kills the flavor instead of bringing it out. Never operate your roaster at higher temperature to save time.
5. Stop at Your Desired Roast Level and let the beans cool
Stop the roast when the beans reach your desired level and remove the beans from the heat immediately. Pour them into a colander and shake vigorously to cool them fast. Toss them around for 2-3 minutes until they reach room temperature. This stops the roasting process and prevents overcooking.
6. Let Your Beans Rest: The Importance of Degassing
Fresh-roasted coffee beans need time to chill out before you brew them. Let your beans rest for at least 24-48 hours after roasting. During this time, the beans release built-up carbon dioxide gas that can make your coffee taste harsh, sour, and uneven.
Store them in a container with a one-way valve or leave the bag slightly open to let the gas escape. Darker roasts degas faster, while lighter roasts need more time. Skipping this stage can dull the coffee’s true flavor and aroma, while allowing proper degassing will lead to a smoother, richer cup.
I recommend waiting 1-2 weeks for the best flavor. For espresso, you definitely want that full week or two of rest, while pour-over and drip methods can handle slightly fresher beans. Trust me – patience pays off with smoother, more balanced flavors in every cup!
7. Store them properly
Store your freshly roasted beans in an airtight container away from light, heat, and moisture – a pantry or cabinet works perfectly. Use containers with one-way valves for the first few days to let CO2 escape, or crack the lid slightly. Keep beans at room temperature and never refrigerate or freeze them, as moisture will ruin the oils.
Use your roasted beans within 2-4 weeks for peak flavor, though they’ll still taste good for up to two months if stored properly.

Pros and cons of roasting coffee at home
Pros
1. Fresh Coffee with Better Flavor: When you roast at home, you control exactly when those beans hit their peak. Most commercial coffee sits on shelves for weeks or months, but yours can go from roaster to cup in just days.
2. Customize Your Roast: Want a light roast that highlights fruity notes? Go for it. Prefer something dark and smoky? You’re in control. You can experiment with different origins and roast levels until you find your perfect cup.
3. Save Money Over Time: Green coffee beans cost about half the price of roasted beans. Sure, you’ll spend some upfront cash on equipment, but if you drink coffee regularly, you’ll break even pretty quickly.
4. It’s a Fun Hobby: Roasting coffee at home is not just a task—it’s a hobby. You’ll learn about different coffee origins, roasting chemistry, and develop a whole new appreciation for your morning brew.
Cons
1. Takes Time and Practice: Roasting isn’t as simple as pushing a button. It requires attention, timing, and experience. You may burn a few batches before getting it right, especially when trying new methods or beans. Your first few batches might taste terrible.
2. Requires Equipment: While you can start simple with a pan or popcorn maker, you might find yourself wanting better equipment as you get more serious. Good home roasters can cost hundreds of dollars, and you’ll need proper storage containers, too.
3. Can Get Messy or Smoky: Roasting coffee produces chaff (thin skin from beans) and smoke, especially at darker roast levels. Without proper ventilation, your kitchen may become filled with smoke and unpleasant odors. Cleanup can also be a hassle.
4. It takes real time and attention: Roasting isn’t something you can just set and forget. You need to watch, listen, and smell your way through the process. Each batch requires your full attention for 10-20 minutes, and that’s just the roasting part. Also, Home roasters can’t handle large amounts. If you drink a lot of coffee, you’ll end up roasting pretty often.
Check out Related Guides
FAQs
How long does it take to roast coffee?
Home roasting usually takes 8 to 15 minutes, depending on the method and desired roast level.
Is it better to roast coffee fast or slow?
Most coffee experts prefer a medium roasting speed – not too fast, not too slow. Fast roasting can create uneven flavors and burnt notes, while very slow roasting can make beans taste flat and underdeveloped.
Do coffee beans get bigger when roasted?
Yes, coffee beans get bigger when you roast them. They can expand up to 50-100% in size as moisture escapes and gases build up inside, making them puff up like little popcorn kernels.
References: