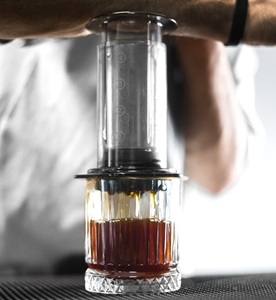
The AeroPress isn’t exactly an espresso machine, but it can make a bold, espresso-style coffee. You make it by using a finer grind, less water, and a shorter brew time – maybe 30-60 seconds instead of the usual 2-3 minutes. The result tastes rich and concentrated, somewhat like espresso, but it lacks that signature crema and the full body you get from a proper espresso machine. It’s more like a strong, clean concentrate that you can drink straight or use as a base for milk drinks.

Can Aeropress make authentic Espresso?
Technically, no. The Aeropress can’t make “true” espresso because it doesn’t use the high-pressure (9 bars) that traditional espresso machines do. But it can still brew a concentrated, bold shot with a similar flavor and strength.
So, if you’re craving an espresso-like flavor for your homemade lattes or iced coffee, the Aeropress is a great choice.
How to Make Espresso with Aeropress?
What will you need?
Here’s a quick list of things you’ll need to make espresso with an Aeropress:
- Aeropress (classic or Aeropress Go)
- Coffee beans (medium to dark roast)
- Coffee grinder
- Metal filter (optional but recommended)
- Kettle or hot water
- Spoon or stirrer
- Scale (optional for accuracy)
Step-by-Step Instructions
You can follow this easy method to make a rich espresso-style shot with your Aeropress.
Step 1: Grind the Coffee
Use about 18–20 grams of coffee. Make sure to grind it finer than drip coffee but not as fine as authentic espresso. It should feel like table salt.
Step 2: Set Up Your Aeropress
Place the metal or paper filter in the cap and rinse it with hot water. This will remove any paper taste and warm the brewer.
Step 3: Add Coffee and Water
Add the ground coffee into the Aeropress chamber. Start your timer and pour the hot water slowly, making sure all the grounds get wet. You’re using way less water than normal (50- 60mL) – Aim for a 1:3 coffee-to-water ratio.
Step 4: Stir and let it Steep
Give it 3-4 quick stirs to make sure all the coffee is fully saturated and let it steep for 30-45 seconds.
Step 5: Press
Insert the plunger and start pressing slowly and steadily. You should feel resistance. It should take about 20–30 seconds to press all the way down. You’ll feel more resistance than usual because of the fine grind and less water.
Step 6: Taste & Add Milk/Water
Take a sip and see how it tastes. It should be bold, rich, and have a thick body. The concentrate works great as a latte base – simply add milk until it reaches the desired taste. You can also add a splash of hot water first to make it like an Americano.
Some tips for Aeropress Espresso
Use Metal Filters
Metal filters let more coffee oils pass through, giving you a richer body and flavor, similar to real espresso. You can also reuse them, which saves money in the long run.
Use a Flow Control Cap
If you’ve got the AeroPress Flow Control Cap, use it! It holds back the brew until you’re ready to press, giving you more control and a richer, espresso-like shot. It also builds a little more pressure, which helps mimic real espresso
Best Coffee Beans for Aeropress Espresso
Dark roasted beans are best for making espresso with the Aeropress, as darker roasts extract flavors more quickly. These roasts bring out bold, chocolatey flavors and work great with milk.
Don’t Drink It Straight – Use It as a Base
For me, Aeropress espresso doesn’t taste nearly as good as real espresso when I drink it black. It can be pretty harsh and one-dimensional on its own. But it shines as a foundation for milk drinks. Think of it as your DIY espresso shot for lattes, cappuccinos, Americanos, or iced coffee. Always plan to add milk, cream, or ice rather than trying to sip it solo. For lattes, I usually do a 1:2 or 1:3 ratio – one part concentrate to two or three parts steamed milk.
Aeropress Espresso Recipe
Equipment
- Aeropress
- Grinder
- Kettle
Ingredients
- 18-20 g Dark Roasted Coffee
- 60 mL Hot Water
Instructions
- Grind the Coffee: Grind 18-20g coffee finer than drip but coarser than espresso – like table salt texture.
- Set Up Your Aeropress: Place filter in cap, rinse with hot water to remove paper taste and preheat.
- Add Coffee and Water: Add coffee to the chamber and pour in 50–60mL of hot water (just off boil).
- Stir and Steep: Stir 3-4 times quickly and let it steep for 30-45 seconds.
- Press: Insert plunger and press slowly for 20-30 seconds with steady pressure.
- Add Milk/Water: Taste the concentrate – add milk for lattes or hot water for americano-style drinks.
FAQs
Can you use Espresso Grind in Aeropress?
You can, but it’s not ideal. Espresso grind is usually too fine and can cause clogging. Instead, use a slightly coarser grind, like something between espresso and drip.
Is Aeropress Better Than Moka Pot for Espresso?
Both Moka pot and Aeropress coffee makers are great choices for making espresso at home in a easy and affordable way. AeroPress offers more control over brew time, pressure, and grind size, making it easier to tweak for a smoother, cleaner espresso-style cup. The Moka pot, on the other hand, brews a bolder, more intense flavor but with less precision.
Check out Related Aeropress Recipes:


