Aeropress is a compact and portable coffee maker that uses air pressure to brew smooth, rich coffee in minutes. It is 3 in 1 brewing system that works part like a French press with immersion brewing, part like an espresso machine with pressure extraction, and part like a pour-over with clean filtration.
This article covers everything you need to know about the Aeropress coffee maker. You’ll learn what Aeropress is, how it works, and step-by-step instructions on how to brew coffee with it.
I’ll also explain different brewing techniques, the best coffee beans, filters, brew ratio, and grind size. Plus, you’ll get tips on cleaning, the difference between Aeropress Original and Aeropress Go, and the key benefits of using Aeropress.
What is Aeropress?
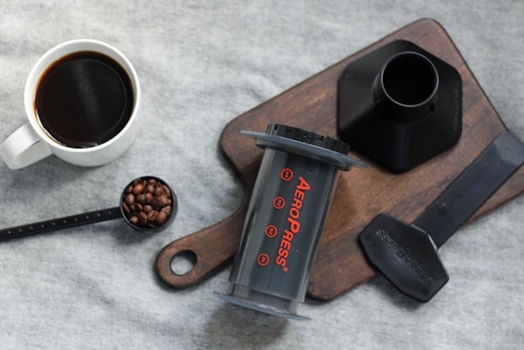
Aeropress is a portable coffee maker invented by Alan Adler in 2005. It produces a clean, smooth cup with low acidity and minimal bitterness. The device is incredibly portable and durable. It’s made from BPA-free plastic that can handle travel and outdoor use. Many coffee lovers (including me) take their AeroPress camping, to the office, or on trips because it’s lightweight and nearly unbreakable.
The AeroPress has gained a huge following worldwide. There’s even an annual World AeroPress Championship[1] where competitors create unique recipes and brewing techniques. This has helped establish the AeroPress as one of the most popular manual coffee brewing methods available today.
How does Aeropress work?
The AeroPress works through a simple but effective process. You place a paper filter in the bottom cap and attach it to the brewing chamber. Then you add ground coffee and hot water to the chamber. After stirring briefly, you insert the plunger and press down slowly. This forces the coffee through the filter under gentle pressure.
The brewing method combines elements of immersion and pressure brewing. The coffee steeps for about 30 seconds to 2 minutes, depending on your preference. Then the pressing action extracts the coffee quickly, typically taking just 20-30 seconds to complete the press.
How to use Aeropress?
Using an Aeropress is simple, and once you get the hang of it, it becomes a quick and routine process. Here is how to use it:
What you’ll need?
- Aeropress coffee maker
- Aeropress paper or metal filter
- Fresh ground coffee
- Hot water (around 175°F – 80°C)
- Stirrer or spoon
- Timer
- Mug
Step by Step Instructions
- Insert Filter: Place a paper filter inside the filter cap and give it a quick rinse with hot water. This removes any paper residue and also preheats the cap, ensuring better flavor in your brew.
- Attach Filter Cap: Once the filter is in place, screw the cap firmly onto the bottom of the Aeropress brewing chamber. Make sure it’s tightly secured to prevent leaks when pressing.
- Add Coffee: Measure 14-18 grams of medium-fine ground coffee and pour it into the chamber. Use freshly ground beans for the best flavor and aroma in your cup.
- Place on Mug: Set the Aeropress securely on top of your mug or cup. The fit should be secured to prevent tipping over when you start pouring water.
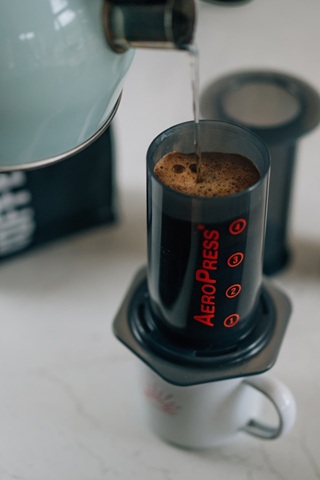
- Pour Water: Slowly pour hot water over the coffee grounds until you reach the marked level on the chamber. The best temperature is around 185°F (90°C) for a smooth, balanced flavor.
- Stir: Stir the mixture gently for about 10-15 seconds with a spoon or stirrer. This makes sure all the coffee grounds get soaked evenly, so they brew just right.
- Insert Plunger: Place the plunger inside the chamber and push down slowly with steady pressure. The pressing should take around 20-30 seconds.
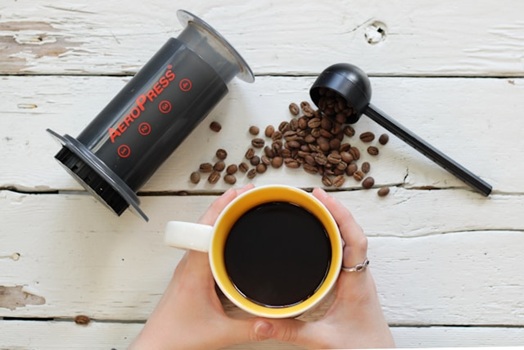
- Enjoy: Once you’ve pressed down, remove the Aeropress from the cup. Your fresh, flavorful coffee is ready to enjoy.
What are the different Aeropress brewing Techniques?
The following are the different AeroPress brewing techniques:
Standard Technique
This is the classic way of using the Aeropress as described in the above instructions. You add your coffee, pour hot water, stir, and press gently for a smooth and clean brew. It’s simple and works great for everyday coffee making.
Inverted Method
In the inverted Aeropress method, you flip the Aeropress upside down before you start. This gives you more control over how long the coffee steeps, which means you can get a richer, bolder flavor. It also helps stop any leaks while brewing. If you like your coffee strong and full-bodied, this method is a great option to try.
Cold Brew
With the Aeropress Cold Brew Method, you can make rich and smooth cold brew coffee without waiting 12-24 hours. You use room temperature water and place the Aeropress upside down. Steep the coffee for about 5 to 10 minutes, then press it through the filter just like the hot method, creating a smooth cold coffee concentrate in minutes. You can drink the cold brew as it is or add ice for a cooler, refreshing taste.
Espresso
You can use Aeropress to make Espresso-Like brew. You make it by using more coffee (1:5 ratio), finer grind, less water, and a shorter brew time – maybe 30-60 seconds instead of the usual 2-3 minutes. It will taste rich and concentrated, somewhat like espresso. This method works well for homemade Americanos or as a base for milk-based drinks.
Latte
To make an Aeropress Latte, you can brew a strong coffee using the espresso-style method. Then you simply add steamed or frothed milk to this concentrated coffee, creating a smooth latte that tastes much similar to what you’d get from an espresso machine.
Some Expert Tips for AeroPress
Best coffee beans for Aeropress
For the best flavor, light or medium roast coffee beans are the top choice for the Aeropress. I love using Ethiopian or Colombian single-origin beans for their bright, fruity notes. You can also try a medium roast from Guatemala or Brazil if you prefer something smoother. Just grind them medium-fine, and you’re good to go!
Always choose fresh beans; freshness matters more than the brand when it comes to taste.
Filters to use with Aeropress
The AeroPress comes with round paper filters that most people use – these create a clean, smooth cup by filtering out oils and fine particles. You can also buy metal filters as an alternative, which let more oils and fine particles through, creating a fuller-bodied coffee that’s closer to what you’d get from a French press.
Paper filters cost more over time since you replace them with each brew, while metal filters are a one-time purchase that lasts for years.
Best brew ratio for Aeropress
The best brew ratio for the Aeropress coffee is a 1:15, which means 1 gram of coffee for every 15 grams (or ml) of water. This typically works out to about 17-20 grams of coffee with 250-300ml of water. For stronger coffee, you can go with a 1:12 ratio, or a 1:20 ratio gives you a lighter, more delicate cup. The right ratio depends on your personal flavor preference.
Best grind size for Aeropress
A medium-fine grind is the best grind size for Aeropress, similar to the texture of table salt. If the grind is too fine, it will clog the filter, and if it’s too coarse, your coffee will taste weak.
How to Clean Aeropress Quickly?
- Push Out the Coffee Grounds: After brewing, remove the filter cap and firmly push the plunger to eject the used coffee grounds (puck) and filter.
- Rinse the Plunger and Chamber: Rinse both the plunger and chamber under running water to wash away leftover grounds.
- Wipe or Air Dry: Shake off excess water and wipe with a clean cloth or let the parts air dry.
- Deep Clean Occasionally: You don’t need soap every time, but you can wash it with mild soap once in a while to remove oil build-up.
You can even run it through the top rack of the dishwasher (AeroPress is dishwasher safe).
Aeropress Original vs Aeropress Go: What’s better?
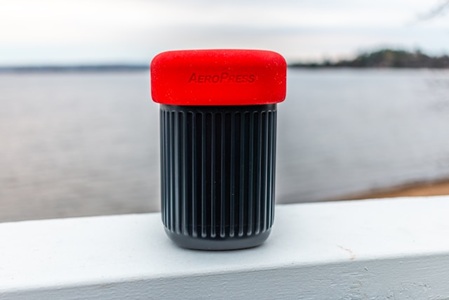
The Aeropress Original is the classic full-size version that makes about 8-10 oz of coffee and works great for home use. The Go is a compact travel version that makes about 6-8 oz and comes with its own insulated mug that doubles as a carrying case. Both models brew the same quality coffee and work the same way.
For home brewing, the Original is better. It gives you more flexibility with batch sizes and feels more substantial during the brewing process. The larger chamber also makes it easier to experiment with different brewing techniques.
If you travel frequently, work in an office, or have limited counter space, the Go is better. It packs incredibly small, includes everything you need in one unit, and the built-in mug means you don’t need extra gear.
What are the benefits of Aeropress?
Smooth and Flavorful Coffee: The AeroPress produces exceptionally clean, smooth coffee with low acidity and minimal bitterness.
Portable and Lightweight: Its compact size makes it ideal for travel, camping, or office use. It fits easily in your backpack or carry-on. Plus, it’s made from BPA-free plastic, so it’s really tough and won’t break easily.
Quick and Easy to Use: The Aeropress makes coffee in minutes and is super easy to use. It’s a no-fuss way to make coffee that anyone can handle. Even if you’re a beginner, you’ll get great results without needing fancy kettles, perfect pouring skills, or complicated timing.
Quick to Clean: Cleaning is hassle-free. Just pop out the used coffee puck, rinse the parts, and you’re done in seconds.
Affordable: Compared to other coffee makers like espresso machines, the Aeropress is budget-friendly and offers great value for money.
Versatile Brewing Options: You can use standard or inverted brewing methods, make cold brew in minutes, or create espresso-style concentrates for Lattes, Americanos, or Cappuccinos. There’s also a large, active community of users sharing brewing tips and recipes online.[2]
FAQs
Why is my Aeropress coffee bitter?
Your AeroPress coffee is probably bitter because you’re over-extracting the coffee. This usually happens when you use too fine a grind, steep for too long (over 3 minutes), or use water that’s boiling or too hot (over 190°F).
Why is my Aeropress Hard to Push?
Too fine a grind or pressing too fast can make the Aeropress hard to press. Use a medium-fine grind and apply slow, steady pressure.
Does Aeropress make Espresso?
Aeropress can make a strong, espresso-style brew, but not real espresso. Real espresso needs high pressure (9 bars), which Aeropress doesn’t create.
What is the difference between an Aeropress and a French press?
The French press is an immersion brewing technique where coffee grounds soak in water for a while and give a rich and full-bodied brew. And the AeroPress uses air pressure to push water through the coffee grounds quickly. The French Press is usually bigger, allowing you to brew multiple cups at a time.
Read a Guide on Aeropress vs French Press
Can you use an AeroPress for tea?
Yes, you can definitely use an AeroPress for tea with the inverted method. It works great with loose-leaf teas. Place the AeroPress upside down, add the tea leaves, pour hot water, steep for the appropriate time (usually 2-5 minutes depending on the tea type), then press slowly. The paper filter removes all the tea leaves, giving you a clean cup without any bits.
References