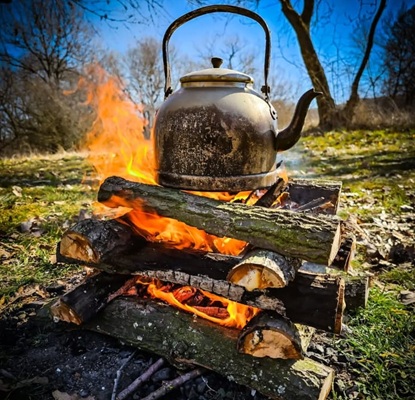
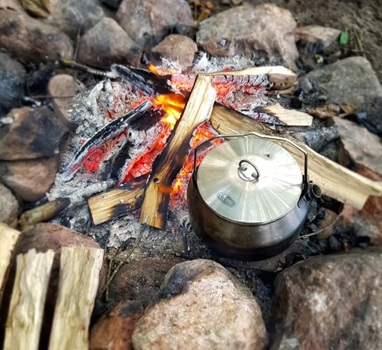
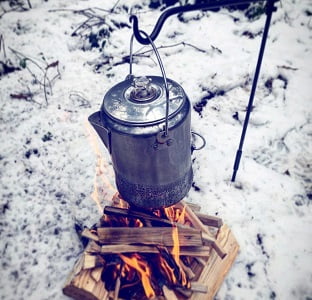
Cowboy coffee is as old-school as it gets. It’s the kind of coffee cowboys brewed right over a campfire, using just water, ground coffee, and a pot. You boil the water, toss in the coffee grounds, and let it steep. It’s strong, bold, and has that wild, outdoorsy feel that fits perfectly with life on the trail.

This old-school brewing method doesn’t need filters, electricity, or fancy machines. It’s perfect for camping, road trips, or any other off-grid adventure.
In this guide, you’ll learn everything about cowboy coffee method, the right grind size, the best beans, expert brewing tips, and how it compares to other camping methods like French press and percolators. Stick around, because making smooth, bold cowboy coffee is easier than you think.
What is Cowboy Coffee?
Cowboy coffee is a traditional brewing method in which ground coffee is boiled in water without the use of a filter or machine. It’s commonly made over a campfire using a pot or kettle. This method was widely used by American cowboys and pioneers who needed a simple way to brew coffee outdoors. Cowboy coffee uses coarse-ground beans, and the grounds settle at the bottom of the pot after boiling.
The process is straightforward and ideal for camping or situations where a coffee mixer isn’t available. It’s one of the oldest brewing techniques still used by outdoor coffee lovers today.
What does Cowboy Coffee taste like?
Cowboy coffee tastes bold, earthy, and slightly smoky. It has a full-bodied flavor with more grit and intensity than filtered coffee. Since it’s boiled directly with coarse grounds, the oils and fines stay in the brew, giving it a heavier mouthfeel.
However, cowboy coffee is pretty unforgiving if you mess up the process. Let the water boil too hard or leave the grounds in too long, and your coffee becomes muddy and gritty with an acrid, over-extracted flavor that’s very unpleasant to drink. The timing and temperature control are important because there’s no filter to save you from mistakes.
How to Make Cowboy Coffee
Here’s how to make the Best cowboy coffee at home or on your camping trips:
What you’ll need?
- Coarse-ground coffee (like sea salt)
- Water
- Metal pot or Saucepan
- Heat source (campfire, gas stove, or grill)
- Mug
- Optional: Crushed eggshells or a pinch of salt to reduce bitterness and help the grounds settle
Step by Step Instructions
Step 1: Measure Water and Coffee: Measure your water based on your mug size. The best ratio for cowboy coffee is 2 tablespoons of grounds for every 8 ounces of water. Pre-measure at home for easier camp brewing.
Step 2: Boil the Water: Get your campfire going strong or turn on your stove and bring the water to a rolling boil. Don’t add coffee yet.
Step 3: Cool Slightly Before Brewing: Once the water starts bubbling, remove the pot from the heat and wait 10 seconds. This lowers the water to about 200°F, which is the ideal brewing temperature.
Step 4: Add Coffee Grounds and Stir: Dump your coarse coffee grounds directly into the hot water. Use about 1-2 tablespoons per cup, depending on how strong you like it. Stir the mixture once to make sure all grounds get wet, then stop stirring.
Step 5: Let it Sit: Let the coffee steep for 4-5 minutes, just leave it be—no stirring or shaking, or it might get a bit gritty!
Step 6: Settle the Grounds: Slowly pour a splash of cold water over the grounds. This helps them sink to the bottom of the pot. You can also use crushed eggshells instead of cold water if you don’t want to dilute your coffee.
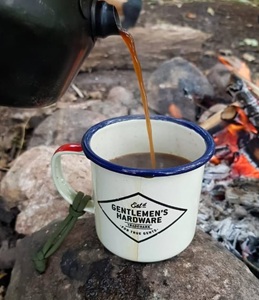
Step 7: Pour Slowly: Slowly pour the coffee into your mug. Avoid tilting the pot too fast; you don’t want the grounds from the bottom ending up in your cup.
Some Expert Tips for Cowboy Coffee
Use more coffee at high altitudes: I recommend increasing the amount of coffee grounds at high altitudes because the boiling temperature drops, and weaker water results in weaker coffee.
Don’t Overboil: Let the water boil, then remove the pot from the fire for 10 seconds before adding the grounds. Overboiling causes bitterness.
Use Eggshells: Crush up clean eggshells and add them to the coffee before pouring – the calcium in the shells binds with bitter compounds and helps settle the grounds faster. You’ll get a smoother, clearer cup with less sediment floating around.
Steep in Warm Sand: .After you add your coffee grounds, nestle your pot into warm sand around the edge of your campfire. The sand keeps your coffee hot enough to steep properly without the harsh, direct heat that burns the grounds.
Pour with a Tilt: Set your pot on a slight slope while it rests. When pouring, keep the tilt direction to guide the grounds into one corner. Pour slowly from the high side to avoid disturbing settled grounds.
Don’t Drink the Last Sip: Always leave the final quarter-inch of coffee in your cup untouched – that’s where any escaped grounds settle. It’s better to waste a little than sip muddy coffee.
Cowboy vs other camping brewing methods
Cowboy coffee is simple. It needs no filters, no gear, just a pot, coffee grounds, and fire. But how does it compare to other brewing methods like the French press and percolator? Let’s break it down.
Cowboy vs French Press
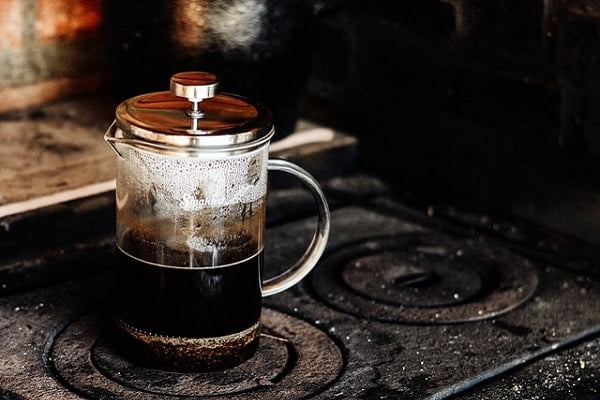
French press coffee gives you complete control over your brewing process – you steep coarse grounds in hot water for exactly 4 minutes, then press down a metal filter that separates the grounds from your coffee completely. The result is a clean, full-bodied cup with rich oils and flavors intact, plus you can make it consistently perfect every single time.
The French press requires a separate heating source and needs careful cleaning, which might be cumbersome for hiking or backpacking. Cowboy coffee is easier in the wild; just rinse the pot and go.
Cowboy vs Percolator
Percolator coffee works by cycling boiling water up through a tube and down through coffee grounds over and over again, creating a continuous brewing loop that can go on for 5-10 minutes. That results in a strong and slightly bitter (overcooked) coffee drink.
Cowboy coffee only boils once. You let it rest to settle the grounds. The taste is stronger but less bitter. It’s faster, too. Cowboy coffee is done in 7–8 minutes, while percolators take a little longer.
A percolator is bulky and harder to carry. Cowboy coffee only needs a pot. That makes it great for ultralight travel or solo camping.
Related Articles
- Best ways to make Coffee while camping
- How to make coffee with whole beans
- How to make black coffee less bitter
- 14 Ways to Make Coffee
FAQs
What is the Best Grind Size for Cowboy Coffee?
The best grind size for cowboy coffee is coarse, like sea salt. Coarse grounds settle to the bottom more easily and give a cleaner brew without filters. If you go with fine grounds, they’ll float on top and make your coffee muddy.
What are the best Coffee Beans for Cowboy Coffee?
Medium roast beans work best for cowboy coffee. They give a bold, rich flavor that pairs well with the boiling method. Freshly ground beans always make a better cup. Avoid extra dark roasts—they may taste bitter when boiled.
How to filter Cowboy Coffee properly?
You don’t need a physical filter for cowboy coffee. The grounds sink naturally during the 4-5 minute steeping time. To settle all the grounds, sprinkle a little cold water on top or use crushed eggshells.
How to Make Cowboy Coffee Less Bitter?
To make cowboy coffee less bitter, avoid overboiling. Boil the water first, remove from the heat, then add the grounds. Let it steep for 4 minutes. Use fresh beans and the right water-to-coffee ratio (2 tablespoons per 8 oz of water). Adding a pinch of salt or eggshells can also balance the taste.