The AeroPress inverted method is a brewing trick where you flip the AeroPress upside down before you start. This gives you more control over how long the coffee steeps, which means you can get a richer, bolder flavor. It also helps stop any leaks while brewing. If you like your coffee strong and full-bodied, this method is a great option to try.
Many coffee lovers, including me, prefer this method because it brings out a bolder, fuller flavor. Whether you’re new to Aeropress or want to up your game, this guide will show you the right steps, tools, and tips for brewing rich coffee the upside-down way.
The inverted Aeropress Recipe
The inverted method is perfect if you want a strong, flavorful cup with full control. Here’s how to do it:
What you’ll need
- Aeropress coffee maker
- Metal filter or paper filter
- Gooseneck kettle (optional but helpful)
- Coffee grinder (optional but better)
- Coffee scale (optional but helpful)
- Timer (optional but helpful)
- Stirrer or spoon
- Fresh roasted coffee beans
- Hot water (195°F to 205°F)
- Coffee mug
Step by Step Instructions
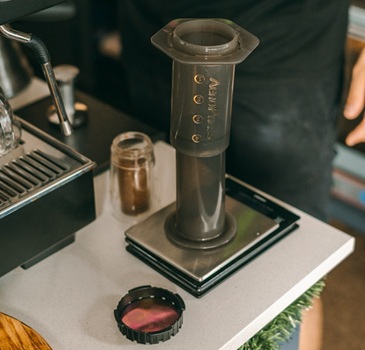
Step 1: Assemble the Aeropress Upside Down
Place the plunger into the AeroPress just a little, then flip it upside down so the plunger is on the bottom and the open end is facing up.
Step 2: Add Coffee Grounds
Grind your coffee to a medium-fine texture, like table salt. Use about 13-15 grams of coffee per cup, which is around 2 to 2.5 tablespoons.
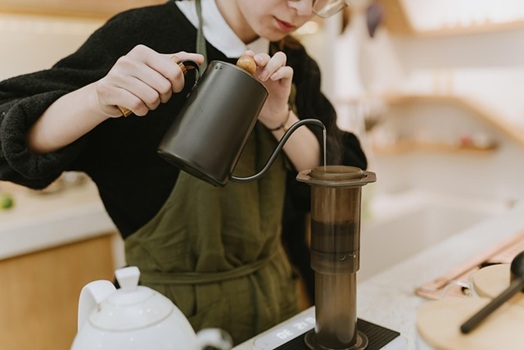
Step 3: Add water
Slowly pour hot water (about 200°F or 93°C) over the coffee grounds—use about half of the total water you plan to use. For example, if you’re brewing a 200 mL cup, pour around 100 mL now. Stir gently to saturate all the grounds and let it bloom for 30–45 seconds.
Step 4: Let it steep
Let it steep for about 1 to 2 minutes, depending on how strong you want your coffee.
Step 5: Attach the Filter
Place your metal or paper filter inside the cap and rinse it with hot water. Then, screw the cap onto the chamber tightly.
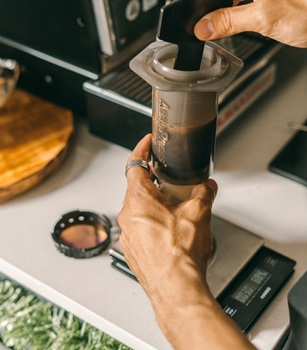
Step 6: Flip the Aeropress
Hold your mug over the filter cap, grip both parts firmly, and flip the whole Aeropress over the cup.
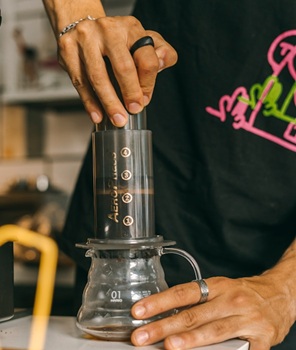
Step 7: Press and Enjoy
Press down slowly and evenly—the plunge should take around 30 to 50 seconds. You’ll hear a gentle hissing sound at the end—that’s totally normal and means you’ve pressed out all the coffee. Add the remaining half hot water to the brewed coffee and enjoy.
Expert Tips for the Inverted Aeropress Method
Dial in the Grind Size: Use a consistent burr grinder and adjust the grind based on your coffee. Medium to slightly coarse grinds are spot on. Finer grinds pull out more flavor, but if they’re too fine, they can get gunky and taste bitter-so be sure to experiment and taste often.
Let the Coffee Bloom: Pour about half of the water first and let your coffee bloom for 30 seconds. This initial pour should wet all the grounds evenly. The bloom releases CO2 and primes your coffee for even extraction.
Wet the Filter Before Attaching: Rinse the paper or metal filter with hot water before use. This removes any unwanted taste and helps the filter sit properly.
Don’t Press Too Fast: Start pressing around 1:30–2:00 and take 20–40 seconds to finish. A slow, steady press keeps bitterness out and gives a balanced body. Stop when you hear the hiss—pushing past that often pulls bitter compounds from the puck.
Use the Bypass Trick: I always brew a strong concentrate, then dilute with extra hot or room temperature water after pressing. This gives more control over strength and flavor. Start with a 1:2 coffee-to-water ratio and adjust to taste.
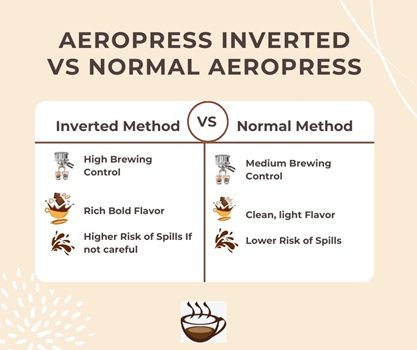
Aeropress Inverted vs Normal Aeropress
When comparing the inverted Aeropress method to the traditional one, each has its pros and cons. The key differences lie in control, flavor, and ease of use. Here’s a detailed breakdown of both methods:
Inverted Methods Give More Brewing Control
With the normal method, coffee starts dripping through the filter immediately. You can’t stop it – gravity does its thing whether you want it to or not. This creates a hybrid brewing style that’s part immersion, part drip.
The inverted method eliminates all dripping until you flip and press. Your coffee steeps in full immersion, just like a French press. You decide exactly when the extraction begins and ends.
Flavor Profile
The inverted method usually produces a richer and bolder cup of coffee. The longer steeping allows deeper extraction of flavors, making the brew stronger and more robust.
The normal method gives a cleaner and lighter taste. It’s ideal for those who enjoy a milder, brighter cup of coffee.
Normal Aeropress Method is Easy and simple
The normal method forgives mistakes easily. Pour your water, give it a stir, and press when ready. It’s perfect for busy mornings or when you’re brewing for someone else who just wants good coffee without the fuss.
The inverted method requires more skill and attention. You need steady hands to flip without spilling, precise timing for optimal extraction, and you’ll definitely make a mess while learning.
Does Upside Down Aeropress really make better coffee?
Yes, the upside-down (inverted) AeroPress method really does make better coffee for a lot of people. That’s why so many baristas in the World AeroPress Championship use it. It gives you full control over steep time and helps prevent early drip-through, which means you get a richer, bolder flavor with more body.
By flipping the AeroPress, you let the coffee brew longer before pressing—great if you prefer strong or complex cups. You can also use coarser grinds with this method, which some people find brings out more clarity.
However, the inventor of the AeroPress actually discourages using the inverted method. According to their website, it can be unstable and risky, especially with hot water, because it’s more likely to tip over. They recommend a safer alternative: the Flow Control Filter Cap, which can give you longer steep times without flipping the device upside down.
So, What Method should you choose?
The reality is that “better” depends on what you’re after. If you want championship-level complexity and don’t mind the extra technique required, inverted delivers results that speak for themselves. The world’s best baristas aren’t wrong when they consistently choose this method. However, if you prefer the safety and simplicity of the original design, you can still make excellent coffee – just ask AeroPress’s inventors, who spent years perfecting their recommended approach.
Check out Related Aeropress Recipes: