Making cold brew with an AeroPress is surprisingly simple and quick. You get all the smooth, low-acid benefits of traditional cold brew, but instead of waiting 12-24 hours, you’re done in just a few minutes.

The beauty of this method is that you can make individual servings whenever you want cold brew. No planning ahead, no giant batches taking up fridge space. Just fresh, smooth, cold coffee in under five minutes.
How to make Cold Brew with Aeropress?
What will you need?
To start making Aeropress Cold Brew, gather these basic tools and ingredients:
- Aeropress (classic or Aeropress Go)
- Aeropress paper or metal filter
- Freshly ground coffee (medium grind)
- Room temperature water
- A mug or glass
- Stirrer or spoon
- Ice cubes
Optional:
- Milk or cream (for lattes)
- Simple syrup or sweetener
- Flavorings (vanilla, cinnamon, caramel)
Step-by-step instructions
This cold brew recipe uses the inverted Aeropress method for full immersion. It’s fast, smooth, and flavorful.
Step 1: Prep the Coffee and Aeropress
You’ll want about 15 grams of medium ground coffee (roughly 3 tablespoons) to 100 grams of room temperature water. Set up your AeroPress in the inverted position. This means you flip it upside down so the plunger is on the bottom.
Using the Inverted method in the Cold Brew Recipe is important because otherwise, most of your water will drip through in seconds without extracting much flavor
Step 2: Add Coffee and Water
Pour your coffee grounds into the chamber, then add your room-temperature water. Stir the mixture for about 1 minute so that it extracts flavors more quickly
Don’t use Coarse Grounds as used in traditional Cold Brew. Go for medium-fine grounds instead—coarse grounds let the water flow through the AeroPress way too fast!
Step 3: Steep
Let the coffee steep for 3-10 minutes. While you wait, place a filter in the cap and give it a quick rinse with some water.
Step 4: Flip the Aeropress
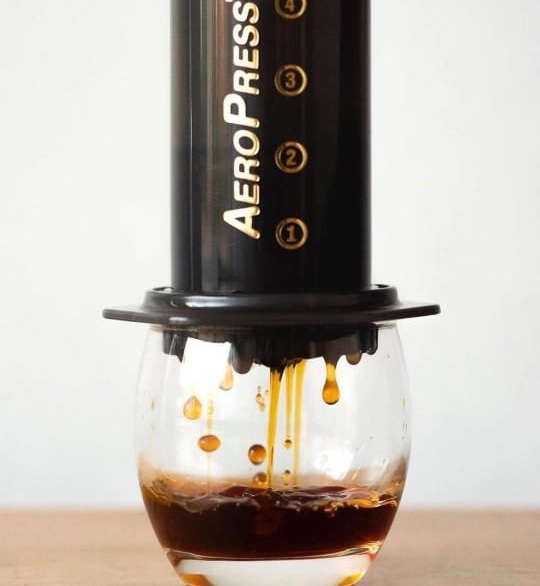
After your steeping time give the mixture a quick stir, screw on the cap and carefully flip the whole thing over onto your cup filled with ice cubes. Press down slowly and steadily – you’ll feel some resistance, which is totally normal. The whole pressing process should take about 30 seconds.
Step 5: Add Water or Milk
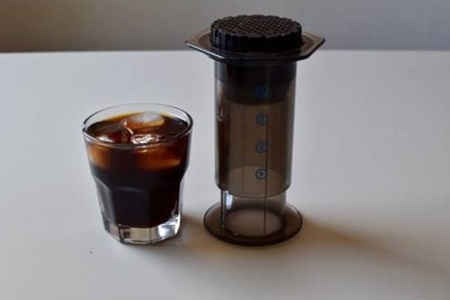
What you get is a concentrated cold brew that’s incredibly smooth. You can drink it straight if you like it strong, or add some cold water or ice to dilute it to your taste. I like to dilute it with a glass full of ice cubes and letting it sit for a few minutes.
Some expert tips for Aeropress Cold Brew
Here are some tips for Aeropress cold brew:
Play with steep time
Start with a 3-minute steeping time. Like it stronger? Let it steep longer. Prefer it smoother? Keep it closer to 3 minutes. Try different times and see what you like best.
Use Dark Roasts
Darker roasts work better for cold brew in the AeroPress. They extract faster and give you richer flavor in less time. Lighter roasts can taste flat or sour because they need more heat and time to fully extract, which this quick cold brew recipe doesn’t give.
Flavoring options
Cold brew is a great base for fun flavors. Try a dash of vanilla syrup, a little cinnamon, a spoon of caramel, or even a bit of cocoa powder. You can also add flavored milk or creamers for an easy twist.
- Vanilla Extract: Add a few drops before steeping.
- Cinnamon Stick: Steep with the coffee grounds.
- Caramel Syrup: Mix into the final brew.
- Coconut Milk: Adds a tropical, creamy touch.
Try the Double Brew Method for a Stronger Taste
Try the double-brew method for extra strength without bitterness. Make your concentrate as usual, then use that concentrate as your “water” for a second AeroPress brew with fresh grounds. It sounds crazy, but it creates an incredibly rich, complex cold brew.
Why I am not a fan of Aeropress Cold Brew and What’s better Instead!
Traditional cold brew recipes call for 12-24 hours of steeping time, and there’s a good reason for that – cold water needs all that time to extract the full spectrum of flavors that make cold brew so smooth, sweet, and low in acidity. AeroPress cold brew only steeps for 3-5 minutes, which results in an underdeveloped cup that misses those rich, chocolatey notes cold brew is famous for.
Instead of trying to rush cold brew with the AeroPress, I recommend brewing hot coffee as usual with your AeroPress and pouring it directly over a glass full of ice cubes. This way you get a bright, clean, and fully extracted coffee that’s immediately cold, with all the complex flavors properly developed from the hot water extraction.
FAQs
Is Aeropress good for Cold Brew?
The Aeropress is great for fast, cold brews. It shortens the brewing time to just a few minutes, delivering smooth, low-acid coffee with less wait and no need for large pitchers or filters. But you’ll miss the real kick of authentic long steeped Cold brew coffee.
Cold Brew vs. Iced Coffee: What’s the difference?
Cold brew and iced coffee are completely different drinks, even though they both end up cold in your cup. Cold brew is made by steeping coffee grounds in cold water—it’s smooth, mellow, and less acidic. Iced coffee is brewed hot and then cooled down, usually by pouring over ice, so it tastes bolder and a bit brighter.
Check out Related Aeropress Recipes: